
Access Denied
IMPORTANT! If you’re a store owner, please make sure you have Customer accounts enabled in your Store Admin, as you have customer based locks set up with EasyLockdown app. Enable Customer Accounts

A Guide to Custom Embroidery on Caps for Australian Brands
Posted By Matthew Malios
on
When it comes to branding, embroidery on caps is so much more than just stitching a logo onto a piece of fabric. It’s about creating a tangible, high-end statement for your brand that people actually want to wear.
Why Embroidered Caps Are a Branding Powerhouse
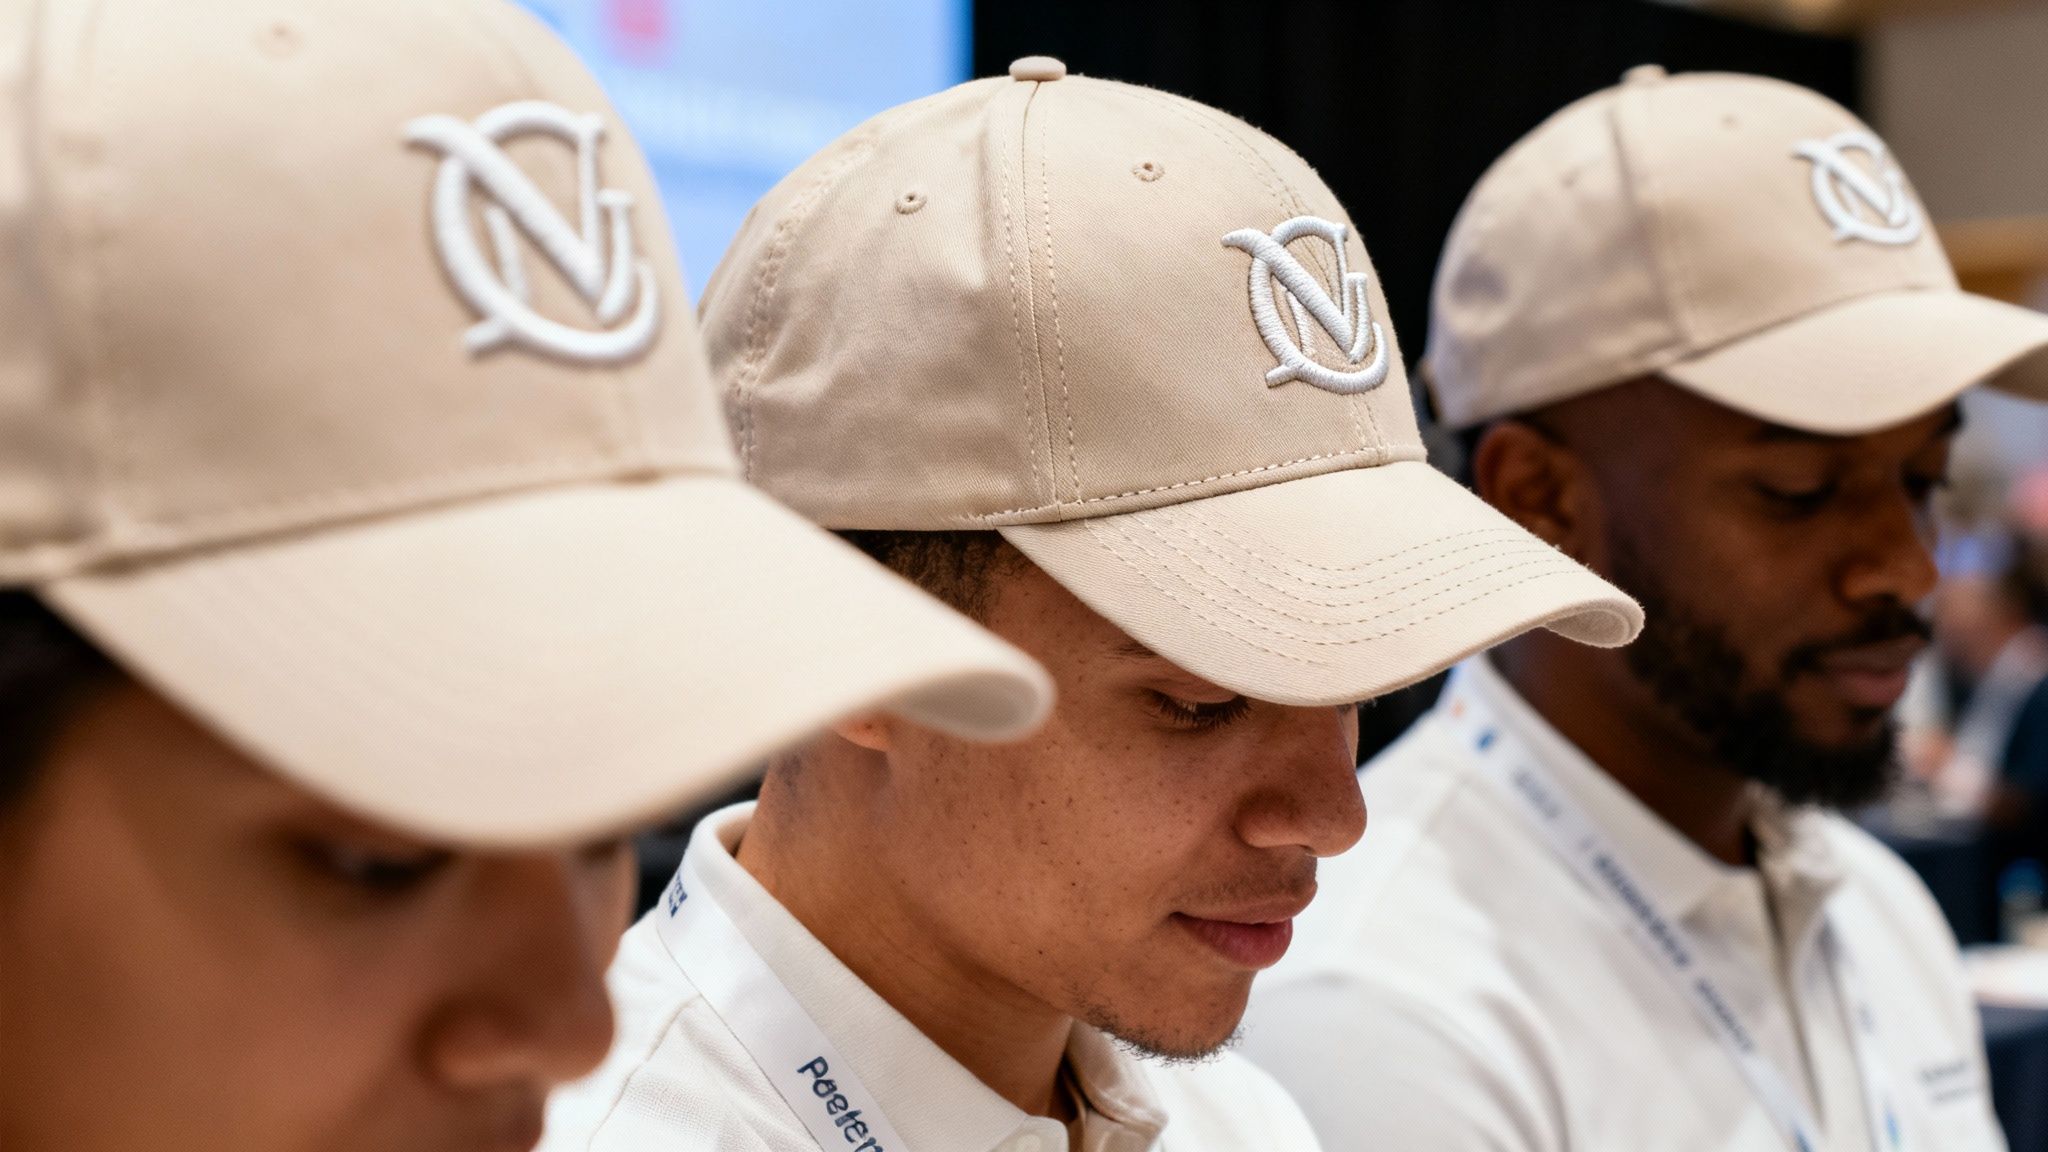
Think of an embroidered cap as a permanent badge of quality. Unlike a screen print that can crack, peel, or fade away after a few washes, embroidery weaves your design directly into the cap. The resulting textured, three-dimensional finish gives it an immediate sense of value and craftsmanship.
For Australian businesses, this transforms a simple cap from a giveaway item into a premium piece of merchandise. Whether it's for a trade show, a corporate golf day, or part of a sharp-looking uniform, embroidered caps turn your staff and customers into proud, walking ambassadors for your brand. That professional look doesn't just get noticed; it builds recognition and sends a clear message of quality and permanence from Sydney to Perth.
Longevity and Lasting Impact
The single biggest advantage of embroidery is its incredible durability. Because the threads are physically stitched into the cap's material, the design is built to last. It can handle day-to-day wear, repeated washing, and the harsh Aussie sun far better than any print. This staying power means your brand stays visible for years, delivering an outstanding return on your initial investment.
A well-made embroidered cap doesn’t just represent your brand for a season; it becomes a long-term fixture in someone’s wardrobe, continuing to promote your business long after a promotional event has ended.
A Cornerstone of Australian Branding
Here in Australia, custom embroidery on caps has long been a go-to method for building brand identity. It's a trusted, reliable way to make an impact that sticks.
- Professionalism: The clean, crisp finish of embroidery is perfect for corporate branding. It projects an image of stability and a genuine eye for detail.
- Versatility: It works beautifully across a huge range of cap styles and fabrics, from classic cotton dad caps to rugged trucker hats and everything in between.
- Tangible Quality: It’s something people can see and feel. That tactile sense of craftsmanship instantly elevates how they perceive your brand.
The local Cut and Sewn Textile Product Manufacturing industry, which covers apparel like embroidered caps, is a serious player in our economy. It’s projected to be worth $2.2 billion by 2026, with 777 businesses operating in the space as of 2025. In such a competitive market, quality customisation is what helps brands thrive.
As one of many high-quality promotional products, embroidered caps offer a distinct advantage in making sure your brand truly stands out from the crowd.
Exploring Different Embroidery Techniques for Caps
When it comes to embroidering caps, it's definitely not a one-size-fits-all deal. The technique you pick has a huge impact on the final look and feel of your design, turning a simple logo into something that really tells your brand's story.
Your main choices are Standard (Flat) Embroidery, 3D Puff Embroidery, and Patch Embroidery. Each one brings its own unique character to the table and suits different design goals and brand personalities. Getting this choice right is the key to making sure your vision translates perfectly from a digital file into textured, durable thread.
So, the big question is: what’s the right vibe for your brand? Are you after a classic, detailed look, or something bold and modern that stands out from a mile away? Let's break down the options.
Standard Flat Embroidery: The Versatile Classic
Think of standard embroidery as painting with thread. It’s the most common and versatile method out there, where the stitches lie flat against the fabric. This creates a clean, professional finish that looks like it’s part of the cap itself.
This technique is the workhorse of the embroidery world for a very good reason. It’s brilliant at handling intricate details, fine lines, and complex lettering. If your logo has small text or sophisticated elements, flat embroidery is almost always the best way to keep everything looking crisp and clear.
It works a treat on just about any cap style you can think of, from unstructured 'dad' caps to classic baseball caps. Its versatility makes it a safe, reliable option for most branding projects, delivering that timeless, high-quality look every time.
3D Puff Embroidery: For Bold and Raised Designs
If flat embroidery is like painting, 3D Puff is more like sculpting. This technique gives your design a dramatic, three-dimensional effect that literally lifts it off the cap’s surface. It’s a fantastic way to make a simple logo pop and really grab people's attention.
So, how does it work? A piece of special foam is placed on the cap, and the machine sews dense stitches right over the top, trapping the foam underneath. The result is a bold, raised logo with a tactile feel that makes you want to reach out and touch it.
3D Puff works best for simple, blocky designs, letters, or shapes. Complex details and thin lines don't translate well, as the foam needs wide, solid areas to create its signature 'puffed' look.
This style is a massive hit on snapbacks and athletic caps, where that confident, modern aesthetic is a perfect match. It adds a premium, high-impact feel that instantly makes the headwear look and feel more valuable.
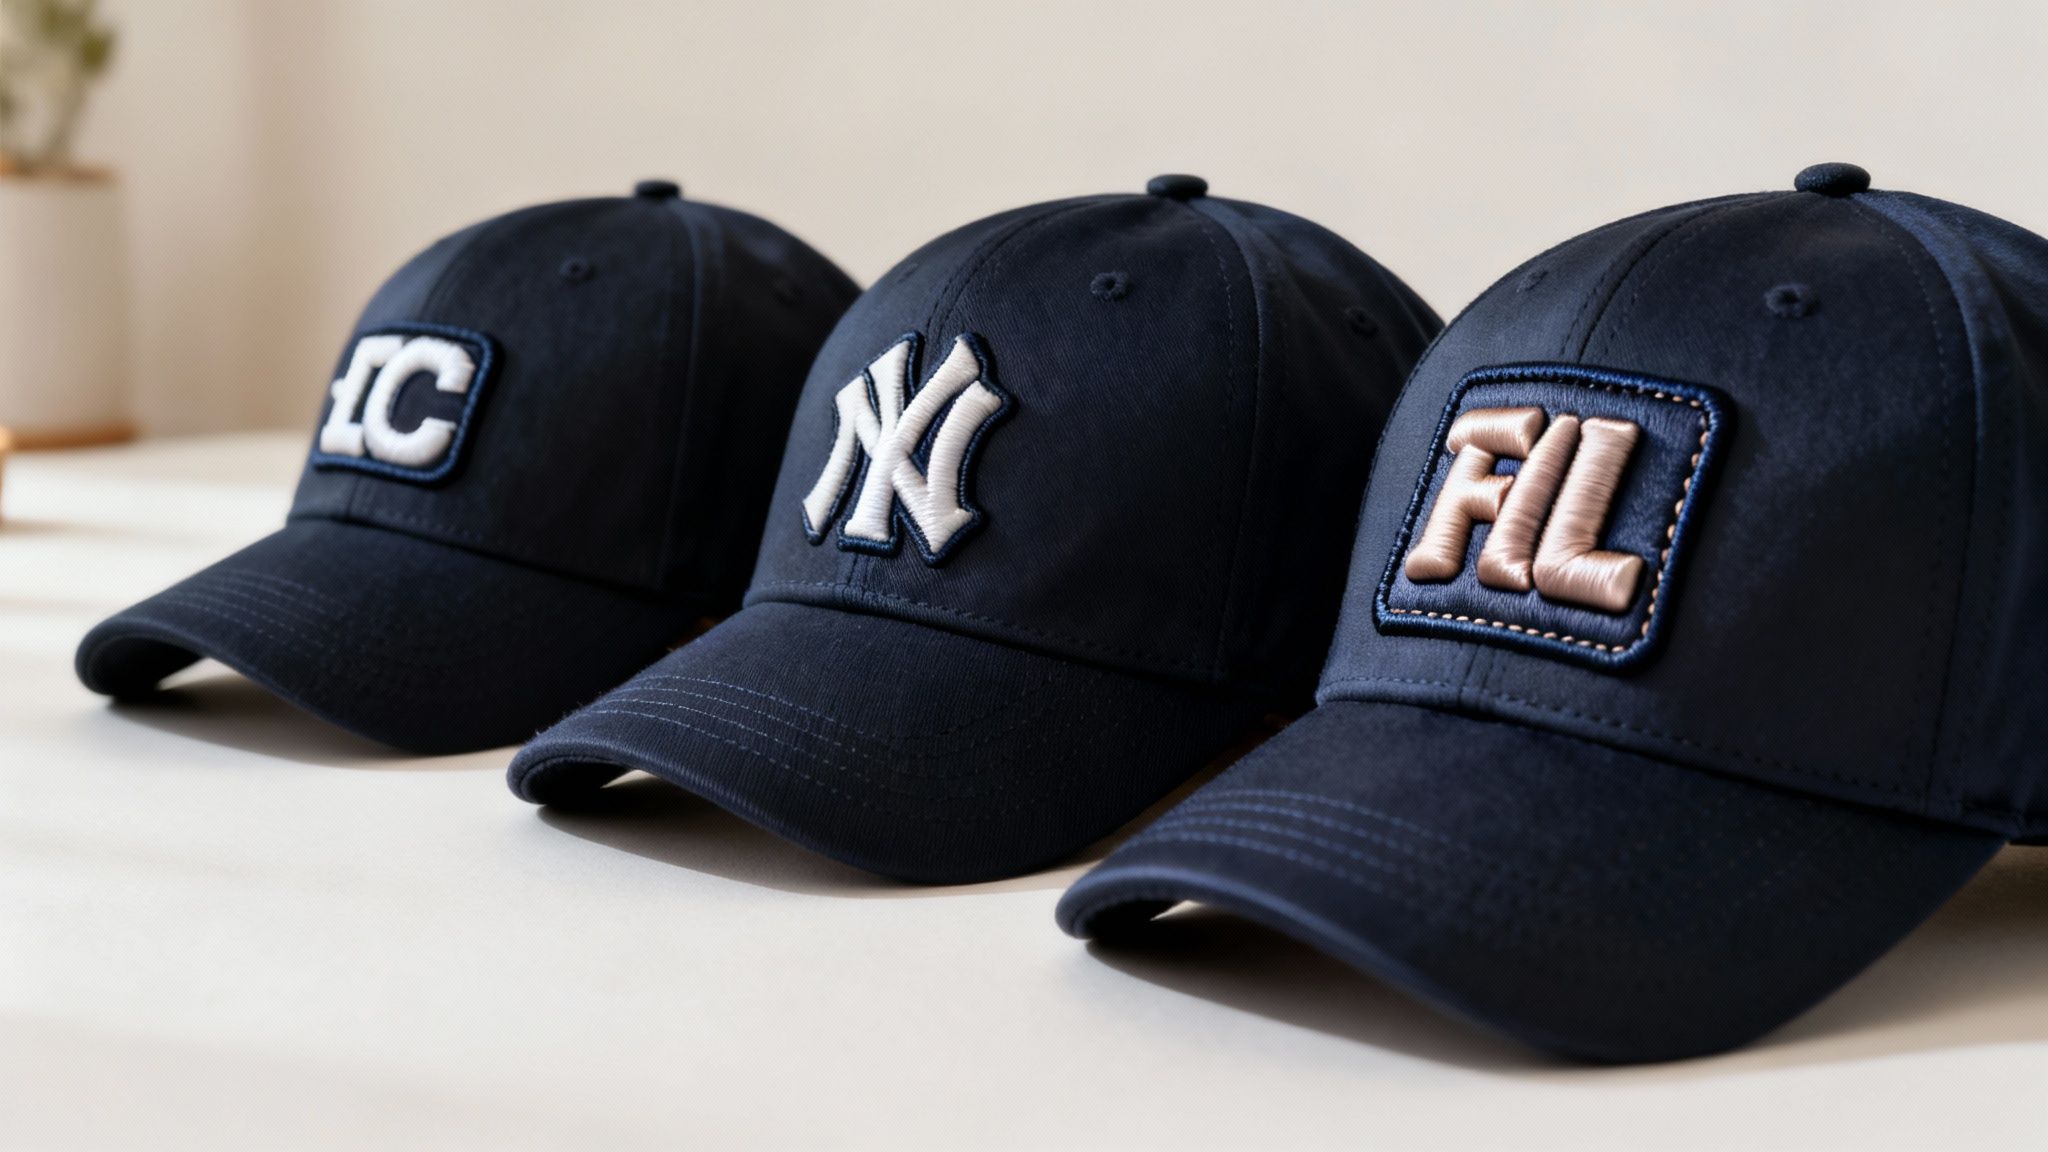
Patch Embroidery: A Distinct and Custom Look
Patch embroidery offers a really unique, layered look that can set your caps apart from the crowd. Instead of stitching the design directly onto the cap, we first embroider it onto a separate piece of material—the patch. This patch is then attached to the cap, usually with a heat press or by sewing it on.
This approach opens up a whole new world of creative options. Patches can be made in all sorts of shapes and sizes, with different border styles like a classic merrowed (overlocked) edge or a clean satin stitch border, giving you another layer of customisation.
Patches are a brilliant solution for:
- Highly detailed logos that might struggle on tricky cap materials like coarse mesh or heavy wool.
- Creating a retro or vintage vibe, calling back to classic workwear or old-school sports teams.
- Adding a distinct, tactile element that creates a cool separation between the design and the cap itself.
Choosing the right technique is a crucial first step. For those who want to get a bit more technical, our guide explaining what is embroidery offers a deeper dive into this fantastic craft.
How to Choose the Right Cap for Your Design
Picking the right cap for an embroidery project is a bit like an artist choosing their canvas. It's not just about finding a place to stick your logo; the cap's style, structure, and fabric all play a huge role in how the final design looks, feels, and holds up over time. Put a brilliant design on the wrong cap, and you could end up with puckering, distortion, or a finished product that just doesn't hit the mark for your brand.
This decision is especially crucial here in Australia, where custom embroidered caps are a go-to for everything from corporate events to team uniforms. It's a massive market—part of a global headwear industry expected to hit $32.1 billion by 2025, with caps making up a huge 37.87% of that revenue. So, getting the cap choice right means your investment not only looks good but also taps into what people want.
Structured vs Unstructured Caps
The first big question to answer is about structure. This all comes down to whether the cap has a stiff lining, called buckram, behind the front two panels. This is what helps a cap keep its classic shape, even when it’s sitting on a shelf.
-
Structured Caps: These are the caps with a firm, rigid front. Think of them as a perfectly prepped, flat canvas ready for your art. This solid surface is fantastic for crisp, detailed embroidery on caps because it gives the needles and thread a stable base to work on. If you have a sharp corporate logo that needs to look clean and professional, a structured 6-panel or a classic snapback is the way to go.
-
Unstructured Caps: Without that firm lining, these caps have a much softer, more relaxed look. This is where you'll find popular styles like 'dad' caps. They're comfortable and have a great casual feel, but that softer front can be a little more challenging for really complex or dense designs. Simpler logos and clean text work beautifully here, leaning into that laid-back, almost vintage vibe.
Finding the Perfect Cap Style
Once you’ve sorted out the structure, the overall style of the cap is what really sends a message. Each one has a different personality, and you’ll want to find one that fits your brand and your audience.
-
Snapbacks and Trucker Caps: With their flat brims and adjustable snap closures, these are a modern staple. The solid front panels on a snapback provide a great surface for both flat and 3D Puff embroidery. Trucker caps are a bit different with their mesh backing, meaning all the embroidery action happens on the front foam panel—but that panel is an excellent, stable base for a bold design.
-
Baseball Caps and Dad Caps: You can't go wrong with a classic. The standard 6-panel baseball cap is incredibly versatile and works for almost anything. Dad caps are simply the softer, unstructured version, perfect for a more casual, everyday look. Both are fantastic all-rounders for standard flat embroidery.
-
Five-Panel Caps: Now, these are a designer's dream. They have a single, seamless front panel, which means you get a big, uninterrupted canvas to play with. This makes them the perfect choice for larger or more unconventional designs that would be awkwardly split by the centre seam on a typical 6-panel cap. A great example of this is the unique Rainbow Cat Embroidered Five Panel Cap, which shows just how much creative freedom this style offers.
If you want to see these styles and more side-by-side, have a browse through a huge range of custom headwear styles to find the perfect fit for your project.
Matching Materials to Your Design
The fabric of the cap is just as important as its shape. Different materials behave differently when they're being stitched, and that can have a big impact on the final quality and texture of the embroidery.
Choosing the right material isn't just about how it feels; it's about function. A fabric that works with your embroidery technique, not against it, will keep the design looking sharp for years and prevent common problems like pulling or puckering.
Here are a few of the most common materials you’ll come across:
- Cotton Twill: This is the workhorse of the cap world, and for good reason. Its tight, diagonal weave creates a smooth and stable surface that’s ideal for pretty much any embroidery design you can throw at it, from tiny text to detailed logos.
- Wool Blends: If you're after a more premium, classic look, wool blends are a fantastic option. They're heavier and have a richer texture that works beautifully with embroidery, creating a high-end finish that’s perfect for corporate gifts or upmarket merchandise.
- Performance Synthetics: Fabrics like polyester are common in sports or performance caps because they're great at wicking moisture. These materials can be a bit stretchy, so it's absolutely vital to use the right backing (a stabiliser) during embroidery to stop the design from warping or stretching out of shape.
To help you put it all together, here’s a quick rundown of which cap styles and fabrics work best for different situations.
Cap Style and Material Suitability for Embroidery
| Cap Style / Material | Best For Embroidery Type | Ideal Use Case | Key Consideration |
|---|---|---|---|
| Structured 6-Panel | Flat, 3D Puff, Detailed Logos | Corporate Branding, Uniforms, Retail | The centre seam can interrupt designs placed directly in the middle. |
| Unstructured "Dad" Cap | Simple Logos, Text, Minimalist Designs | Casual Merchandise, Promotional Giveaways | The soft fabric requires good backing to prevent puckering with dense stitches. |
| Snapback / Trucker | Bold Graphics, 3D Puff | Streetwear Brands, Events, Youth-focused Promos | Embroidery is limited to the front foam panel on trucker styles. |
| Five-Panel | Large, Uninterrupted Graphics | Artist Merch, Fashion Brands, Unique Designs | The flat, seamless front is perfect for creative, oversized artwork. |
| Cotton Twill | Almost All Embroidery Types | All-Purpose Use, General Merchandise | A reliable and versatile choice that consistently produces clean results. |
| Wool Blends | High-End, Textured Embroidery | Premium Corporate Gifts, Winter Headwear | The thicker fabric can add a sense of depth and quality to the stitching. |
| Performance Synthetics | Simple, Low-Density Designs | Sports Teams, Outdoor Events, Fitness Brands | Fabric stretchiness must be managed with proper stabiliser to avoid distortion. |
Ultimately, the best cap is one where the style, structure, and material all work in harmony to make your embroidered design look its absolute best. Taking a moment to consider these elements will pay off big time in the final product.
Getting Your Artwork Ready for Perfect Embroidery
Turning a digital logo into a stitched masterpiece isn't as simple as uploading a standard image file. Embroidery machines don't understand pixels; they read a very specific language of stitches. Getting this translation right is what turns a flat design into a textured, professional piece of branding that really pops.
It all starts with your artwork file. While JPEGs and PNGs work perfectly for websites or print, they just don't cut it for embroidery. These are raster files, built from a grid of pixels. If you try to enlarge them, they get blurry and lose their sharp edges, which makes them a poor foundation for creating clean stitch paths.
This is where vector files come in. They are the gold standard for any branding project, but especially for embroidery. Formats like .AI (from Adobe Illustrator) or .EPS use math to create lines and shapes, meaning you can scale them from the size of a postage stamp to a giant billboard without losing a single bit of quality. Handing over a vector file gives your embroidery expert the cleanest possible blueprint to work with.
The Make-or-Break Step: Digitisation
With a clean vector file in hand, we move to the most critical stage: digitisation. This is the highly skilled process of converting your artwork into a stitch file (usually a .DST file) that the embroidery machine can actually read and sew. It’s far more art than science.
Think of a digitiser like a music composer. Your logo is the melody, but the digitiser has to write the entire score. They decide where every single stitch goes, what type of stitch to use, the direction it should run, and how dense the stitching should be. It’s a meticulous process of translating your visual design into a physical, threaded reality.
A professional digitiser does more than just trace your logo. They have to think ahead, planning the stitch path to account for the cap's curve, the pull of the fabric, and the thickness of the thread. This is how you get a final product that’s clean, stable, and a perfect representation of your brand.
This hands-on expertise is absolutely essential for high-quality embroidery on caps. Sure, automated software exists, but it often churns out messy, inefficient results that cause puckering, misaligned colours, and a design that just looks cheap. An experienced human digitiser anticipates and solves these problems before the cap even touches the machine.
Key Design Rules for Flawless Embroidery
To make sure your design looks as good in thread as it does on screen, there are a few golden rules to follow. These tips will help you sidestep common issues and ensure a professional finish.
-
Watch Your Text Size: Thread has a physical thickness. If your text is too small, the stitches will merge and blur, making it impossible to read. A good rule of thumb is to make sure letters are at least 6mm high for clarity.
-
Simplify Intricate Details: Tiny, complex details that look amazing on a screen or a business card often get lost in translation when sewn. It’s usually best to simplify these fine elements for a cleaner, more impactful embroidered logo.
-
No Gradients Allowed: Embroidery machines work with solid colours of thread. They simply can’t replicate the smooth colour blending of a gradient. Your design needs to be converted into solid blocks of colour to be stitched properly.
For a more detailed look at getting your files in order, check out our artwork submission tips: a simple guide for beginners. It’s full of handy info to make the whole process a breeze.
Before we even get to digitising, the first step is always choosing the right cap.
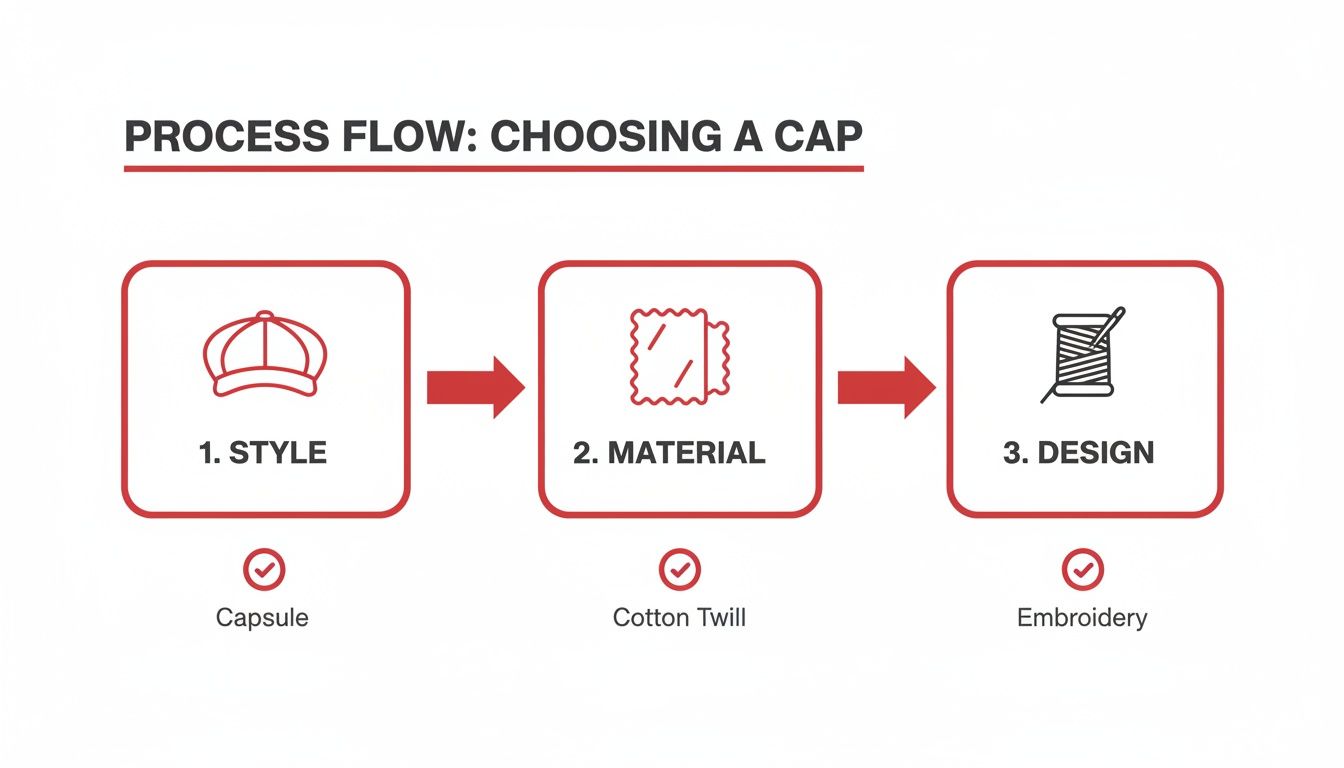
As you can see, the cap style and material are foundational choices that influence how the final embroidered design will turn out.
Giving Your Digitiser What They Need
To get the best possible result, you can help your digitiser by providing clear instructions along with your vector file. This eliminates guesswork and ensures they can bring your vision to life accurately.
-
Specify Your Thread Colours: Don't just hope for a close match from what you see on screen. Providing Pantone (PMS) colour codes for each part of your design allows for precise colour matching with the available threads.
-
Define the Final Size: Be clear about the exact dimensions (width and height) you want the finished embroidery to be. This is vital, because a design digitised for a 10cm width can't just be shrunk to 5cm; it would need to be completely re-digitised to look right.
-
Confirm the Placement: Let them know exactly where the design should go—front and centre, left side, back, etc. Each placement has unique size limits and may require small tweaks to the stitch file for a perfect finish.
By following these simple steps, you’re setting your project up for success and ensuring your caps look polished, professional, and ready to show off your brand.
Nailing the Placement and Understanding the Cost
When you're ready to create custom headwear, two questions always jump to the front of the queue: "Where can we put our logo?" and "What's it going to cost?" Getting clear on these from the start helps you design something that not only looks great but also fits your budget.
Let's begin by mapping out the real estate on a standard cap. There are a few key zones where embroidery works best, but each has its own set of rules and size limits. Knowing these boundaries is the first step to creating a knockout design.
Finding the Sweet Spot: Placement and Size
Without a doubt, the most popular spot for a logo is right on the front. It’s the largest and most visible area, making it prime for your main branding message. But it's not an unlimited canvas.
- Front Embroidery: This is your hero placement. On most structured caps, the maximum embroidery height you can work with is around 5.5cm. The width can stretch to about 12cm, but the real trick is balancing these dimensions so the design sits naturally on the cap's curve.
- Side Embroidery: The left and right sides are perfect for secondary logos, a website address, or small icons. The space here is a bit tighter, usually a circular or square patch of about 5cm by 5cm.
- Back Embroidery: The arch above the rear opening is another fantastic spot. It’s ideal for a tagline, website, or a simple wordmark. On adjustable caps, you can even get creative and embroider directly onto the strap for a subtle, premium finish.
It's worth remembering that these dimensions are just a guide. The specific style of cap you choose—whether it’s a high-profile trucker or a low-profile dad cap—will ultimately dictate the final, workable embroidery area.
How Embroidery Costs are Actually Calculated
Now, let's talk money. A common myth is that the number of thread colours drives up the price. In reality, the single biggest factor that determines the cost of your embroidered caps is the stitch count.
Think of it this way: every design requires a certain amount of work from the embroidery machine. A simple text logo might only need 3,000 stitches, while a large, detailed design could easily top 15,000 stitches. The more stitches, the more machine time and thread are needed, which is what sets the price.
This is great news if you have a colourful logo. You can often use up to 15 different thread colours without paying a cent more, as long as the design's overall stitch count stays the same. It's all about the density and complexity, not the colour palette.
The demand for high-quality branded headwear is on the rise, and it’s easy to see why. More and more Australian businesses are looking for durable, premium branding solutions that last. For a deeper dive into market trends, check out the full Australia embroidery market outlook report.
Other Factors That Tweak the Final Price
While stitch count is king, a few other things can influence your final quote. Keeping these in mind will help you manage your budget and avoid any surprises.
This table breaks down the key factors that determine the final cost of your custom embroidered caps.
| Cost Factor | How It Impacts Price | Pro Tip for Cost-Effectiveness |
|---|---|---|
| Design Complexity | Specialised techniques like 3D Puff embroidery require extra materials (foam) and are more labour-intensive, which increases the per-unit cost. | Stick with standard flat embroidery for the most budget-friendly option. It's classic, clean, and always looks sharp. |
| Order Quantity | Like most custom products, volume is your friend. The larger the order, the lower your price per cap, as setup costs are spread over more items. | If you know you'll need more caps later in the year, consider placing one larger order instead of multiple small ones. |
| Turnaround Time | Need your caps in a hurry? Most suppliers offer express services for tight deadlines, but this priority production usually comes at a premium. | Planning ahead is the easiest way to keep costs down. Give yourself plenty of lead time to avoid rush fees. |
Knowing what influences the final price puts you in control. By exploring your options for in-house custom embroidery services, you can find a solution that perfectly balances stunning visuals with your budget, making sure you get brilliant value from your investment.
Simple Care Tips to Keep Your Caps Looking Great
An embroidered cap is more than just headwear; it’s a walking billboard for your brand. To make sure it stays looking sharp and professional, a little care goes a long way. Getting it right will keep the stitching vibrant and the cap’s shape intact for years.
The number one rule? Keep it out of the washing machine. The aggressive spinning and harsh detergents are the arch-enemies of detailed embroidery. They can fray the threads, warp the brim, and ruin the cap’s structure for good. Stick to hand washing—it's the only safe bet.
Gentle Washing and Stain Removal
For everyday grime or a specific mark, spot cleaning is your best friend. It’s a targeted approach that’s much kinder to the cap’s overall integrity.
-
Spot Cleaning: Grab a bit of mild, bleach-free laundry detergent and mix it with some cool water. Using a soft-bristled brush (an old toothbrush works wonders) or a clean cloth, gently work on the stain in a circular motion. Once you're done, wipe away the soap with a fresh damp cloth.
-
Full Hand Wash: If the entire cap needs a refresh, fill a basin with cool water and a small amount of mild detergent. Let the cap soak for about an hour, giving it a gentle swish now and then. You can pay a little extra attention to grubby areas like the sweatband, but never twist or wring it out. That's a fast track to damaging the fabric and the embroidery.
Drying and Reshaping Your Cap
How you dry the cap is just as important as how you wash it. Whatever you do, don't even think about putting it in a clothes dryer. The high heat is a recipe for disaster—it can shrink the material, melt the threads, and leave you with a misshapen mess.
Proper air-drying is the secret to preserving your cap’s shape. It’s the only way to avoid the damage that heat and machine tumbling will inevitably cause.
After washing, give the cap a good rinse under cool, running water until it’s completely soap-free. Gently pat it with a clean towel to soak up the excess moisture. To help it hold its form as it dries, stuff the crown with a rolled-up hand towel or pop it over something round like a jar. Just leave it to air dry somewhere out of direct sunlight, which can fade the colours over time. Follow these steps, and your cap will stay looking brand new.
Your Cap Embroidery Questions Answered
When you're looking to get custom caps made, a few key questions always pop up. Getting the answers sorted early on makes the whole process smoother and ensures you get exactly what you're after. Let's walk through the common queries we hear from Australian businesses.
We'll cover everything from minimum orders to design quirks and delivery times, so you can plan your project with confidence and get a final product that does your brand proud.
What’s the Minimum Number of Caps I Can Order?
One of the first things people want to know is the minimum order quantity, or MOQ. There isn't one single answer here – it really depends on the supplier, the cap style you choose, and how complex your embroidery design is.
While bigger orders almost always mean a better price per cap, plenty of suppliers are happy to work with smaller businesses. The best bet is always to have a direct chat with your supplier about what you need. They can help you figure out the most cost-effective approach, whether you're after a small batch for your local sports team or a massive run for a national conference.
Can I Embroider a Photograph or a Colour Gradient?
This is a great question and gets to the heart of how embroidery works. Because we're stitching with solid-coloured threads, embroidery can't reproduce the smooth fade of a gradient or the fine details of a photograph. Any designs with these elements need a bit of a rethink before they can be stitched.
Think of embroidery like creating a mosaic with thread. Every piece has to be a solid, distinct colour. A skilled artwork team can take your logo and simplify it, keeping its spirit intact while making it perfect for clean, crisp stitching.
For instance, if your logo fades from blue to white, the digitiser would convert that into two separate blocks of solid blue and solid white thread. This simplification is a critical part of the digitisation process, and it’s what makes a design look sharp and professional when embroidered.
How Long Does It Take to Get Custom Caps in Australia?
Knowing the timeline is crucial, especially if you've got an event or campaign deadline looming. The standard turnaround for custom embroidery on caps has a few stages: getting your artwork set up and approved, the technical digitising work, the actual production run, and finally, shipping.
All up, you should usually allow anywhere from a couple of weeks to over a month. The exact timing really hinges on how large your order is and the intricacy of your design.
Any decent Australian supplier will give you a clear, detailed timeline once they have your final approved artwork. If you're in a rush, many also offer express options. With delivery available right across the country, you can get your custom caps sent straight to your door, whether you're in a major hub like Melbourne and Brisbane or out in a regional town.
Ready to create standout headwear that gets your brand noticed? The expert team at Simply Merchandise makes ordering custom embroidered caps simple and effective. Explore our huge range and get a free quote today! https://simplymerchandise.com.au
Related Posts

The Power of Promotional Products
Why Use Promotional Products? In a digital world that’s constantly shouting for attention, the right promotional product does...
Read More
Personalised Water Bottle Australia: 2026 Guide
Find your perfect personalised water bottle australia with our expert guide for 2026. Choose materials, branding, & suppliers for max...
Read MoreInvalid password
Enter

