

When it comes to custom headwear, there's a reason so many businesses lean on embroidered caps. They just have a premium feel. Unlike a printed logo that can fade or crack over time, a stitched design offers a lasting texture and a professional look that really elevates how people see your brand. Think of it as a smart investment in a walking billboard that holds its quality for the long haul.
Why Choose Embroidered Caps for Your Brand?
Picking the right decoration method for your branded gear is a big decision; it directly shapes your customers' first impression. While printing definitely has its uses, embroidery brings a tangible sense of quality and permanence that other methods just can't match.
Here's a good way to think about it: a printed cap is like a standard paper business card—it gets the job done. An embroidered cap, on the other hand, is like a premium, embossed business card. It feels more substantial and leaves a memorable, high-value impression. That tactile difference is a subtle but powerful way to build a strong brand identity.
The Tangible Benefits of Embroidery
An embroidered logo is physically stitched into the fabric of the cap. This creates a design that not only looks great but is incredibly durable, standing up to all sorts of wear and tear. That longevity means your brand continues to look sharp long after someone receives it, reinforcing your company’s commitment to quality. The raised texture and slight sheen of the thread add a dimension that makes your logo pop.
This versatility makes embroidery a fantastic choice for all kinds of uses:
- Corporate Uniforms: It creates a polished and cohesive look for your whole team.
- Promotional Events: It makes for a premium giveaway item at trade shows and conferences.
- Retail Merchandise: You can create a high-quality product that customers are genuinely proud to wear.
- Team Apparel: It's perfect for building unity and spirit for sports teams and social clubs.
Embroidery transforms a simple cap into a premium piece of branding. The physical depth and texture of the stitches communicate permanence and quality, subtly telling your audience that your brand is built to last.
To get the most out of your embroidered caps, having clear visual brand guidelines is essential for keeping everything consistent. It also helps to understand the different decoration methods available, which is a key part of planning any successful campaign. You can explore a wide variety of options for your business's promotional needs with our full catalogue of branded merchandise for business here: https://simplymerchandise.com.au/pages/branded-merchandise-for-business.
Embroidered Caps vs Printed Caps At a Glance
So, when does embroidery make more sense than printing? This quick comparison table breaks down the core differences to help you decide which path aligns best with your branding goals and budget.
| Feature | Embroidered Caps | Printed Caps |
|---|---|---|
| Durability | Extremely high; threads are fade-resistant and won't crack. | Moderate; ink can fade, peel, or crack over time. |
| Appearance | Professional, textured, high-perceived value. | Flat, smooth finish, good for photorealistic images. |
| Best For | Bold logos, text, and simple graphics. | Complex, multi-coloured designs with gradients. |
| Cost | Higher initial setup, price based on stitch count. | Lower setup, price based on number of colours. |
Ultimately, both have their strengths. But for a classic, durable, and high-end finish that screams quality, embroidery is tough to beat.
Selecting the Right Cap Style and Material
Before we even talk about thread, let’s talk about the cap itself. It’s the foundation for your whole project. Think of it as the canvas for your logo—the style and material you choose will completely shape how people see your brand.
A streetwear label isn't going to pick the same cap as a construction company, right? One might go for a trendy snapback, while the other needs a tough-as-nails twill baseball cap. Each style has its own personality, and getting this choice right is the first, most crucial step in telling your brand’s story. It affects the look, the feel, and how long your cap will last.
Matching Cap Style to Your Brand Identity
Different caps send different signals. If you understand this, you can pick headwear that feels genuinely you and connects with the right people. This is more than just looks; it's a strategic branding decision.
Here are a few of the most popular styles and what they say:
- Baseball Caps (Structured 6-Panel): You can’t go wrong with a classic. The firm, structured front panels create a perfect, flat surface that makes embroidery look incredibly sharp and detailed. This is the go-to for corporate logos, sports teams, or any brand wanting to look polished and professional.
- Snapbacks: With their signature flat brim and plastic snap closure, snapbacks have a modern, urban edge. They’re a huge hit with fashion brands, tech companies, and anyone trying to reach a younger, style-savvy crowd.
- Trucker Caps: That iconic foam front and mesh back give off a relaxed, casual vibe. The foam is fantastic for embroidery because it’s so stable, making logos pop right off the cap. These are brilliant for event giveaways, outdoor brands, and businesses going for a friendly, approachable feel.
- Beanies: When the weather turns cool, a beanie is a great choice. The knitted fabric needs a bit of a different approach—usually a simpler design with a backing to keep it from stretching—but it creates a unique and cosy piece of merchandise.
Think of the cap style as the architecture of your brand's message. A structured cap provides a formal framework for a corporate logo, while a relaxed beanie offers a more personal, community-oriented feel. The right structure ensures your embroidered design is presented perfectly.
Choosing the Best Material for Embroidery
Once you’ve locked in a style, it’s time to think about fabric. The material directly impacts how the embroidery turns out. Some fabrics are a dream to work with, holding stitches perfectly, while others can be a real headache.
A good, sturdy fabric is your best defence against common problems like puckering, where the material bunches up around the stitches, or registration errors, where the different parts of your design don't quite line up. To see the full spectrum of what’s available, you can browse our complete range of custom headwear.
Let's break down the common materials and what they mean for your embroidery.
| Material | Best For | Embroidery Considerations |
|---|---|---|
| Cotton Twill | Detailed logos and everyday wear | This is the gold standard. It’s a strong, stable fabric that holds stitches beautifully, making it perfect for intricate designs. |
| Polyester | Sportswear and performance caps | Great for activewear because it's durable and wicks moisture. The smooth surface can be slippery for thread, so it often needs a stabilising backing to stop stitches from sinking in. |
| Wool Blends | Premium and classic-style caps | Gives you a high-end, classic look. The thick texture is great for bold embroidery, but you might lose some of the super-fine details in the weave. |
| Acrylic (Beanies) | Cold-weather headwear | Because it’s a stretchy knit, it definitely needs a strong stabiliser. You’ll also want to stick to simpler designs to avoid warping the fabric. |
In the end, picking the right cap is a balancing act. You have to weigh up your brand’s image, who you’re trying to reach, your budget, and the technical needs of your specific logo. Get this foundation right, and you're well on your way to creating a stunning embroidered cap that people will actually want to wear.
Understanding Embroidery Types and Placement
Once you've settled on the perfect cap, the next step is where the magic really happens: bringing your design to life with thread. This is the moment a simple piece of headwear transforms into a powerful branding tool. The type of embroidery you choose and where you place it are two of the most critical decisions you'll make.
Think of it this way: the cap is your canvas, and the thread is your paint. You can create a flat, detailed "painting" with standard embroidery or go for a bold, textured "sculpture" with 3D puff. Each technique gives a completely different feel and visual punch, so understanding the difference is key to getting your caps embroidered with style.
The embroidery sector is a serious player in Australia’s textile and apparel industry, which contributes over AUD 10 billion to the national economy annually. Embroidered caps have become incredibly popular, especially for corporate branding and promotional gear. With over 988 commercial embroidery businesses expected to be operating in 2025 and an industry revenue hitting nearly AUD 1.4 billion, the demand for high-quality, custom headwear is undeniable. For a closer look at how local businesses are capitalising on this, check out the full report on the commercial embroidery services industry at IBISWorld.
Exploring Different Embroidery Techniques
The right embroidery method really comes down to your logo’s complexity and the look you’re after. Each style has its own strengths that can make your design pop.
- Standard Flat Embroidery: This is the workhorse of cap embroidery—versatile, clean, and always a great choice. It stitches your logo flat against the cap, creating a sharp, two-dimensional design. It’s perfect for detailed text, intricate logos, and anything with multiple colours.
- 3D Puff Embroidery: If you want your logo to literally stand out, 3D puff is the way to go. We place a small piece of foam under the top stitches, which raises the design off the cap’s surface. This technique adds depth and a premium, tactile quality that grabs attention, making it brilliant for bold letters and simple, impactful shapes.
- Custom Patches: Patches give a distinct, classic vibe. Your design is first embroidered onto a separate piece of fabric, which is then stitched or heat-pressed onto the cap. This method is fantastic for highly detailed logos because it gives you a crisp, contained aesthetic that looks really sharp.
This concept map helps visualise how all the pieces fit together, from the cap style and material to the final embroidered result.
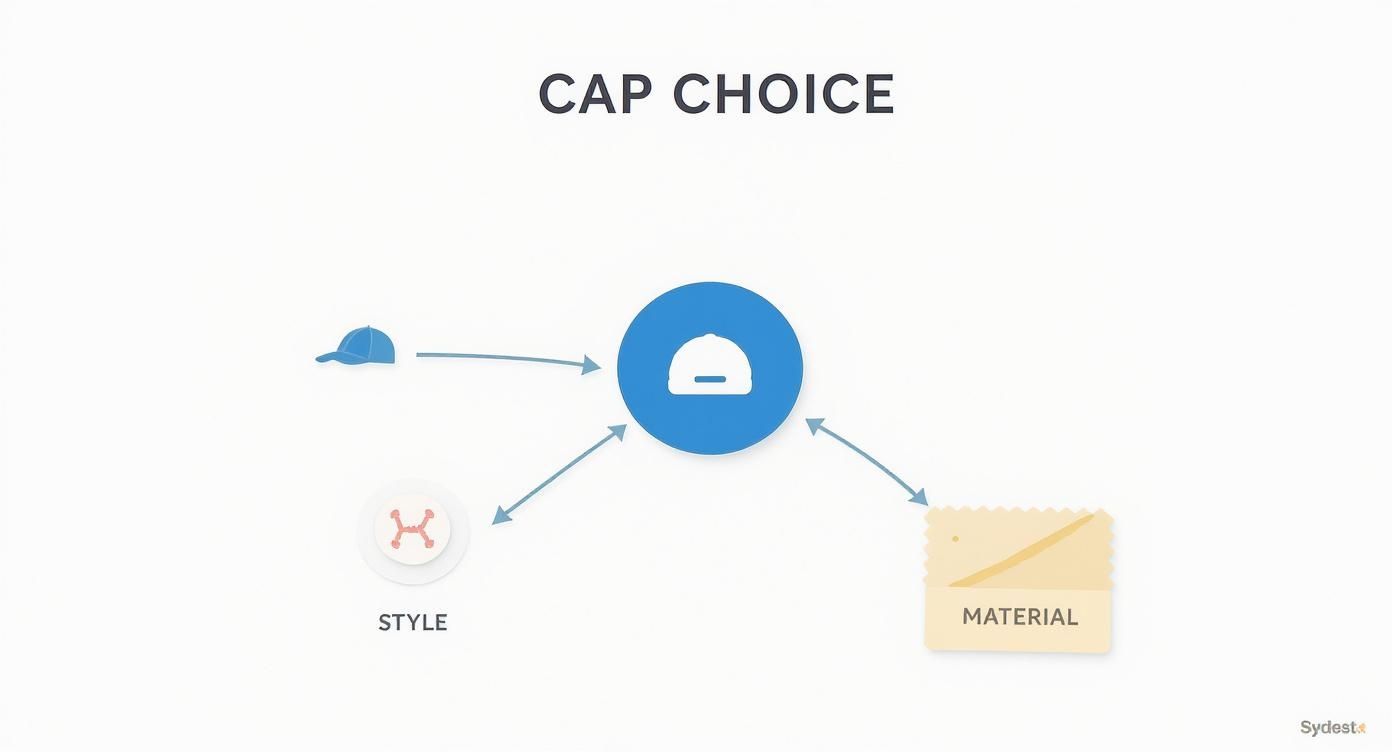
As you can see, the initial choice of cap—both its style and fabric—directly impacts how well your embroidered design will turn out.
An embroidered cap tells a story from every angle. Strategic placement turns unused space into a branding opportunity, ensuring your message is seen whether someone is looking at the front, side, or back.
Strategic Placement for Maximum Brand Impact
Where you put your logo is just as important as how it’s stitched. The front is the obvious choice, but don’t forget about the other spots! Thinking beyond the front panel allows you to create a truly bespoke piece that shows off your brand’s personality.
For a deeper dive into the technical side of things, our guide on what embroidery is breaks down the whole process: https://simplymerchandise.com.au/pages/what-is-embroidery.
Here are the main placement options for getting your caps embroidered to perfection:
- Front Panels: This is your prime real estate. It's the largest, most stable area for embroidery, making it the ideal spot for your main logo. It’s the first thing people see and provides a clean canvas for both flat and 3D puff designs.
- Side Panels (Left or Right): The sides are perfect for secondary branding elements—think a website URL, a small icon, or an anniversary date. The space is a bit smaller, so simpler, cleaner designs work best here.
- Back Arch: The area above the closure at the back is a fantastic spot for a slogan, location, or team name. It adds a professional finish and keeps your branding visible even as someone walks away.
- Closure Strap: For that extra little touch, you can even embroider the cap's strap. It’s usually reserved for very simple text or a tiny logo, but it’s a subtle detail that shows you’ve considered every last aspect of the design.
How to Prepare Your Artwork for Perfect Embroidery
https://www.youtube.com/embed/5MtR6l00VMQ
Getting your artwork ready is easily the most critical part of the whole process. If you want a stunning embroidered cap that perfectly represents your brand, it all starts with the file you provide.
Unlike printing, where a design is just copied onto a surface, embroidery is more of a translation. Your digital file has to be completely rebuilt into a special format the embroidery machine can actually read—a stitch file.
This process is called digitising, and it’s a genuine skill. A specialist digitiser manually maps out every single stitch, essentially creating a set of instructions for the machine. They decide where the needle goes, what kind of stitch to use (like a satin or fill stitch), and when to switch thread colours. It’s less like hitting 'print' and more like an artist painting with thread. A great digitised file is what separates a crisp, professional logo from one that looks messy and amateurish.
File Types: Vector vs Raster
The quality of your original artwork file has a massive impact on the final result. While we can often make do with different formats, some are vastly better for embroidery than others. At the end of the day, it all comes down to providing a clean file that can be scaled without losing any detail.
There are two main types of image files you'll come across:
- Vector Files (The Gold Standard): These are your .AI (Adobe Illustrator), .EPS, or .SVG files. They’re built using mathematical paths and points, not pixels. This means you can scale them up to the size of a billboard or down to the size of a pinhead, and they’ll stay perfectly sharp. This is exactly what a digitiser needs to create clean, precise stitch paths.
- Raster Files (Usable, but with limitations): Think of .JPEG, .PNG, or .GIF files. They're made up of a grid of tiny coloured squares, or pixels. When you try to make them bigger, the computer has to guess what to fill the gaps with, which is why they get blurry and "pixelated." We can work with these, but they often need extra clean-up work to be digitised well.
If you have a vector version of your logo, always send that one. It gives our digitiser the best possible blueprint to work from. For a deeper dive, check out our helpful guide with artwork submission tips for beginners.
A good way to think about it is that a vector file is like a set of architectural blueprints, while a raster file is like a photo of the building. You'll always get a more accurate model from the blueprints.
Simplification and Stitch Count
Here’s something to remember: embroidery is an art of simplification. A needle and thread simply can't reproduce the same tiny details or smooth colour blends that a printer can. Fine lines, subtle gradients, and really small text often get lost in translation.
Small Text: This is a common challenge. Letters under 5-6mm tall are incredibly difficult to make look clean and readable with thread. The stitches tend to bunch up and become a bit of a blob. It's almost always better to remove or simplify any tiny text in your design.
Complex Details: Intricate patterns and gradients need to be re-imagined for thread. For instance, a smooth gradient from light blue to dark blue would be converted into a few solid shades of blue thread, layered to create a similar effect that looks bold and sharp.
This brings us to stitch count—the total number of individual stitches needed to create your design. The stitch count is one of the main things that determines the price of your embroidered caps. A larger, more detailed design means a higher stitch count, which takes more time on the machine and uses more materials.
So, simplifying your artwork isn't just about making it look better; it's also a smart way to manage your budget. To keep everything looking consistent, it’s also a great idea to create a comprehensive style guide that outlines approved logo variations and colours.
Navigating Pricing and Production Timelines
When you're looking to get caps embroidered with your logo, figuring out the costs and timelines is a big part of the puzzle. It’s not like buying a product off the shelf with a fixed price tag. The final cost for custom embroidery is built from several moving parts, and understanding them will help you plan your budget and marketing campaigns much more effectively.
Think of it less as just stitching a logo and more as a complete production process. It starts with setting up your artwork, calibrating the machines specifically for your design, and then running the physical production. Each step adds to the final investment, so let's break down what actually goes into your quote.
What Determines Your Price Per Cap
A few key variables have a direct impact on how much each embroidered cap will set you back. The good news is, once you know what they are, you can often tweak your order to hit your budget without compromising on a great-looking cap.
The biggest cost drivers are:
- Order Quantity: This is a classic economy of scale. The more caps you order, the cheaper each one becomes. Why? Because the setup costs are spread across a bigger batch.
- Stitch Count: As we've covered, this is the total number of stitches needed to bring your design to life. Bigger, more intricate logos mean a higher stitch count, which takes more machine time and thread, pushing the price up.
- Cap Quality: The cap itself is a major part of the cost. A premium, branded wool-blend cap will naturally cost more than a standard cotton twill hat.
- Number of Colours: This isn't as big a factor as it is with printing, but using a lot of different thread colours can bump up the cost slightly. It all comes down to the time it takes for the machines to stop and switch between spools.
It's also worth knowing that wider supply chain trends play a role. A huge chunk—roughly 25-30%—of embroidered caps sold in Australia are actually imported from manufacturing hubs across Asia. This reliance on imports has been growing by about 3-4% each year for the last five years, which can affect everything from material costs to availability. You can dive deeper into these trends by exploring insights on international trade data from the World Bank.
Understanding MOQs and Production Schedules
When you order custom caps, you’ll quickly come across the term Minimum Order Quantity (MOQ). This is simply the smallest order a supplier is willing to produce in one go, and it usually starts at around 20-50 units.
MOQs exist because there’s a fixed cost to getting any job started—digitising the artwork, setting up the embroidery machines, and running a few test stitches. Spreading that initial cost over a decent number of caps is what makes the project affordable for you and worthwhile for the supplier.
Once you’ve given the green light, your order moves through a pretty standard set of stages. A typical timeline looks something like this:
- Artwork Approval: We take your design, digitise it for embroidery, and send a digital proof back to you. This usually only takes 1-2 business days.
- Sampling (Optional): If you want to be extra sure, we can produce a physical sample. It adds a bit of time to the process but gives you complete peace of mind before the main run.
- Full Production: After you approve everything, your caps hit the production line. A standard turnaround is usually between 10-15 business days, but this can change depending on the job.
- Shipping: Finally, we ship them out. Delivery times will vary depending on where you are in Australia.
The key takeaway? Plan ahead. By getting your design locked in early and factoring in these production steps, you can make sure your caps embroidered with your logo land on your doorstep well before your big event or campaign launch. For a detailed timeline that’s specific to your project, the best move is to get a personalised estimate. You can get the ball rolling by submitting a request for a quote with our team.
Seeing It All Come Together: Real-World Examples
All the theory about stitch types and cap styles is great, but the real magic happens when you see how it all plays out in the real world. Let's look at how a few different Australian businesses have used custom embroidered headwear to nail their specific goals.
These examples show how the right mix of cap style, material, and embroidery can create something genuinely powerful for a brand. Every choice is intentional, made to connect with a certain crowd and send a clear message.
A well-designed cap is so much more than just merch. It’s a walking billboard, a team uniform, and a symbol of belonging all rolled into one.
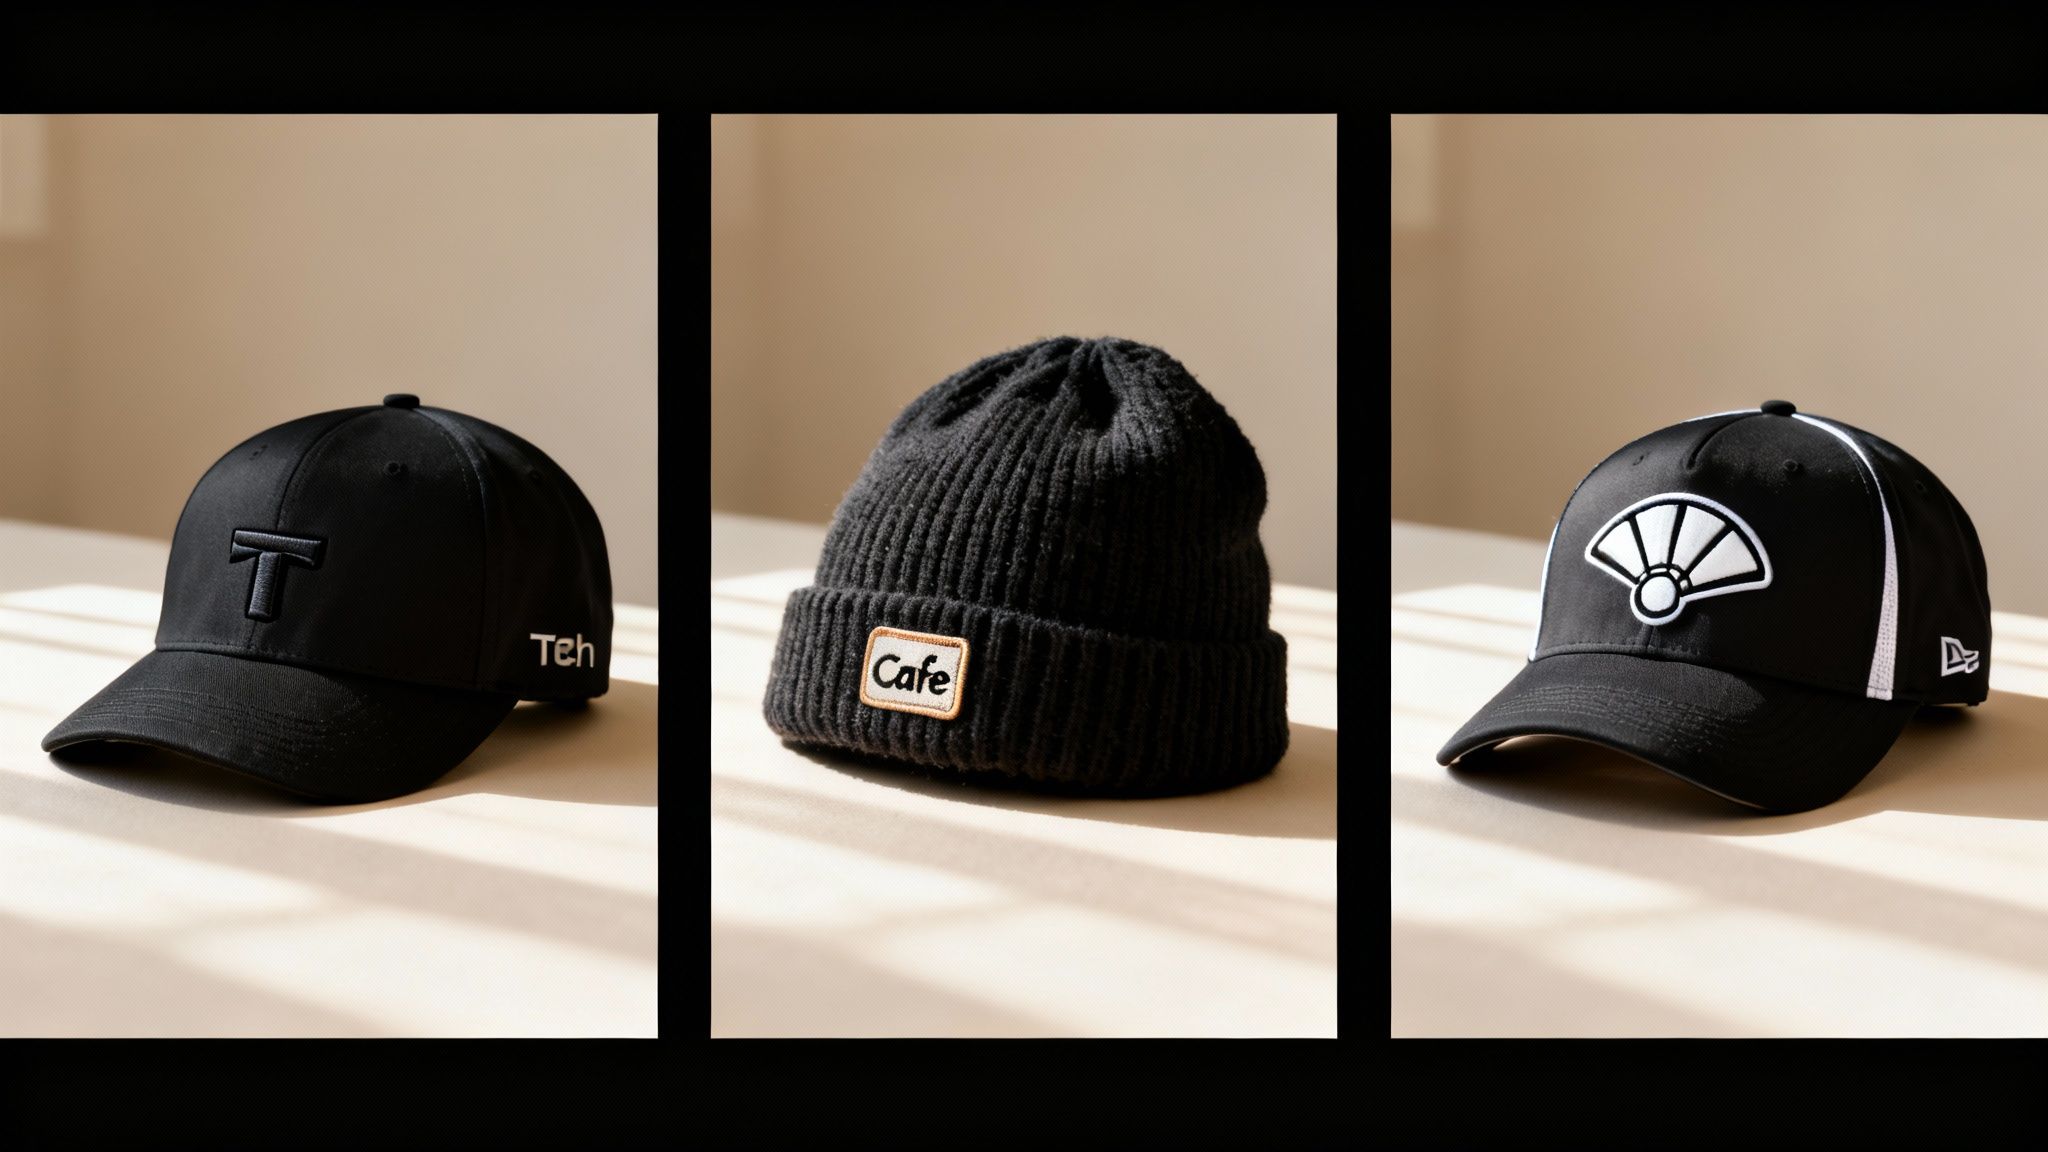
The Tech Startup: Making a Statement
A Sydney tech startup was gearing up for a big industry conference. They needed something to make their team look sharp and unified on the floor, and they wanted a premium giveaway that people would actually use, not just stuff in a bag.
- Their Choice: They went with a sleek, black structured snapback in a high-quality cotton twill. It’s a modern style that just clicks with the tech scene, and the firm front panel was the perfect canvas for their logo.
- The Embroidery: To make their minimalist logo stand out, they used 3D puff embroidery. This made the simple, one-colour design literally pop off the cap, giving it a premium, tactile feel that screamed innovation.
- The Finishing Touch: They kept the front clean and added their website URL in a subtle flat stitch on the back arch. It’s all the info you need, without cluttering the main design.
The result? The team looked cohesive and professional, and the caps became one of the most sought-after giveaways at the event, getting their brand seen long after the conference wrapped up.
The Local Cafe: Building a Community
A beloved Melbourne laneway cafe wanted to create a stronger connection with its regulars and open up a new revenue stream. The goal was to make merchandise that felt just as authentic and cosy as their coffee shop.
- Their Choice: They landed on a soft, acrylic knit beanie in a warm charcoal grey. It was a perfect fit for the cafe's relaxed vibe and a practical choice for Melbourne’s notoriously chilly weather.
- The Embroidery: Instead of direct embroidery, they had a custom patch made with their rustic logo. The patch was then stitched onto the beanie’s cuff, giving it a classic, handcrafted look that perfectly mirrored their artisanal approach to coffee.
- The Outcome: The beanies quickly became a badge of honour for their regulars. Customers would wear them proudly around town, turning into walking advocates for their favourite spot and making the cafe feel like a true local institution.
The Sports Club: Firing Up the Fans
It’s no secret that caps embroidered with team logos are huge in Australia, especially for codes like the AFL and NRL. In fact, sports apparel is a massive market—headwear included, it contributed around AUD 700 million to the Australian sports goods market in 2023. You can see how these products are categorised in the United Nations' trade statistics.
A local rugby club tapped into this passion to boost fan loyalty and raise much-needed funds.
- Their Choice: The decision was easy: a classic, structured 6-panel baseball cap in the team's colours. Made from a durable cotton, it was built to survive many seasons of cheering from the sidelines.
- The Embroidery: They went for maximum impact, putting the club's crest front and centre using detailed, standard flat embroidery. As a nod to their history, the team's founding year was stitched neatly on the side panel.
This created a quality piece of gear that fans were genuinely proud to wear. It was a win-win, successfully building team spirit while generating vital income for the club.
Got a Few More Questions?
Even after getting the full rundown on custom headwear, there are always a few extra questions that come to mind. It's completely normal. This section is all about tackling those common queries we hear from clients every day. Think of it as a final checklist to make sure you're feeling 100% confident before kicking off your order.
Getting these last few details sorted is what makes the difference between a good project and a great one, ensuring the cap you imagined is the one that lands on your doorstep.
What’s the Smallest Order I Can Place?
"How many do I have to order?" is usually the first thing people ask. Most suppliers, including us, have a Minimum Order Quantity (MOQ). For caps, this typically sits somewhere between 20 and 50 units.
This isn't just a random number we pull out of a hat. There's a real cost and time investment in setting up an embroidery job, from digitising your artwork to programming the machines for that specific design. Having a minimum order size allows us to absorb those initial setup costs, which is ultimately how we can give you a better price on each cap. The bigger the order, the more cost-effective it becomes.
Can You Match My Brand’s Pantone Colours Perfectly?
We know that getting your brand colours right is non-negotiable. While a 100% perfect Pantone (PMS) match is technically impossible with thread—it's a physical, dyed material, not a drop of ink on paper—we get incredibly close. So close, in fact, that you'd be hard-pressed to spot the difference.
Our workshop is stocked with standardised thread colour charts featuring hundreds upon hundreds of shades. We'll meticulously find the closest possible match to your specified Pantone code and always get your approval on a digital proof before a single stitch is made. For almost every brand we work with, the final embroidered colour is a perfect real-world representation of their official palette.
Here's a helpful way to think about it: imagine a painter mixing colours on a palette. They have an almost infinite spectrum of shades to create (that's like printed ink). Now, picture a weaver selecting from a massive library of pre-dyed spools of yarn (that's our embroidery thread). Our job is to be experts at finding the perfect spool from that library to bring your brand to life.
How Should I Look After My Embroidered Caps?
A little bit of care goes a long way in keeping your embroidered caps looking sharp for years. The golden rule is to protect both the stitching and the cap's shape. Spot cleaning with a damp cloth should always be your first move.
If it needs a more serious clean, we strongly recommend hand washing it in cold water with a mild detergent. Whatever you do, keep it out of the washing machine and dryer. The intense heat and tumbling can wreck the delicate threads, shrink the fabric, and completely ruin the cap's structure.
What's the Difference Between Stitch Count and Thread Count?
This one trips a lot of people up because the terms sound so similar, but they refer to two completely different things. Let's clear it up once and for all.
- Stitch Count: This is all about the embroidery. It's the total number of individual stitches needed to sew your design onto the cap. A higher stitch count means a more complex, dense, or larger design, which naturally affects the final price.
- Thread Count: This has nothing to do with the embroidery and everything to do with the cap's fabric. It's a measure of the fabric's weave density, telling you about the quality and smoothness of the material itself.
So, in short: stitch count is about your design, and thread count is about the cap's quality.
Ready to create high-quality, custom embroidered caps that make your brand stand out? The expert team at Simply Merchandise is here to help you through every step, from artwork preparation to final delivery. Explore our huge range and get a free quote today.


