

It’s absolutely possible to get great inexpensive custom shirts. The trick is to be strategic about three things: the blank shirt you pick, how complex your design is, and how many you order. For the best value, stick with a basic 100% cotton tee, a simple one or two-colour design, and order in bulk to get those sweet price breaks.
Your Game Plan for Affordable Custom Shirts
Creating custom shirts for your business, team, or event doesn't need to break the bank. The real secret to getting high-quality yet inexpensive custom shirts is simply knowing where the costs are and making smart decisions from the get-go. This guide will walk you through the essentials that drive the final price, helping you find that perfect balance between budget and quality.
When you break it down, the process really comes down to three main areas where you can save a bit of cash:
- The Shirt Itself: This is your base cost. A standard cotton t-shirt is always going to be a more budget-friendly starting point than a fancy tri-blend or a specialised performance fabric.
- The Printing Method: How your design gets onto the shirt makes a big difference. Simple designs with just a few colours are perfect for screen printing, which is super cost-effective for larger orders. For smaller runs with complex, multi-coloured designs, digital printing is often the better way to go.
- The Order Size: This is a big one. The more you order, the less you pay per shirt. It's all about economies of scale.
The Market is on Your Side
The good news for anyone on a budget is that the demand for personalised apparel is booming. In fact, the Australian custom T-shirt printing market was valued at around USD 84.22 million in 2023 and is expected to climb to USD 133.93 million by 2032.
What’s driving this? A lot of it comes down to new digital printing technologies that have made smaller, more affordable print runs a reality. This growth means more players in the market, which leads to more competition and, ultimately, better pricing for you. Whether you need basic promotional tees or more premium branded clothing, your options have never been better.
Key Takeaway: You’re in the driver’s seat. The final cost of your shirts comes down to the choices you make. By planning ahead and deciding what really matters—whether it's the feel of the fabric, the detail in the design, or just getting the most shirts for your money—you can keep your budget firmly in check.
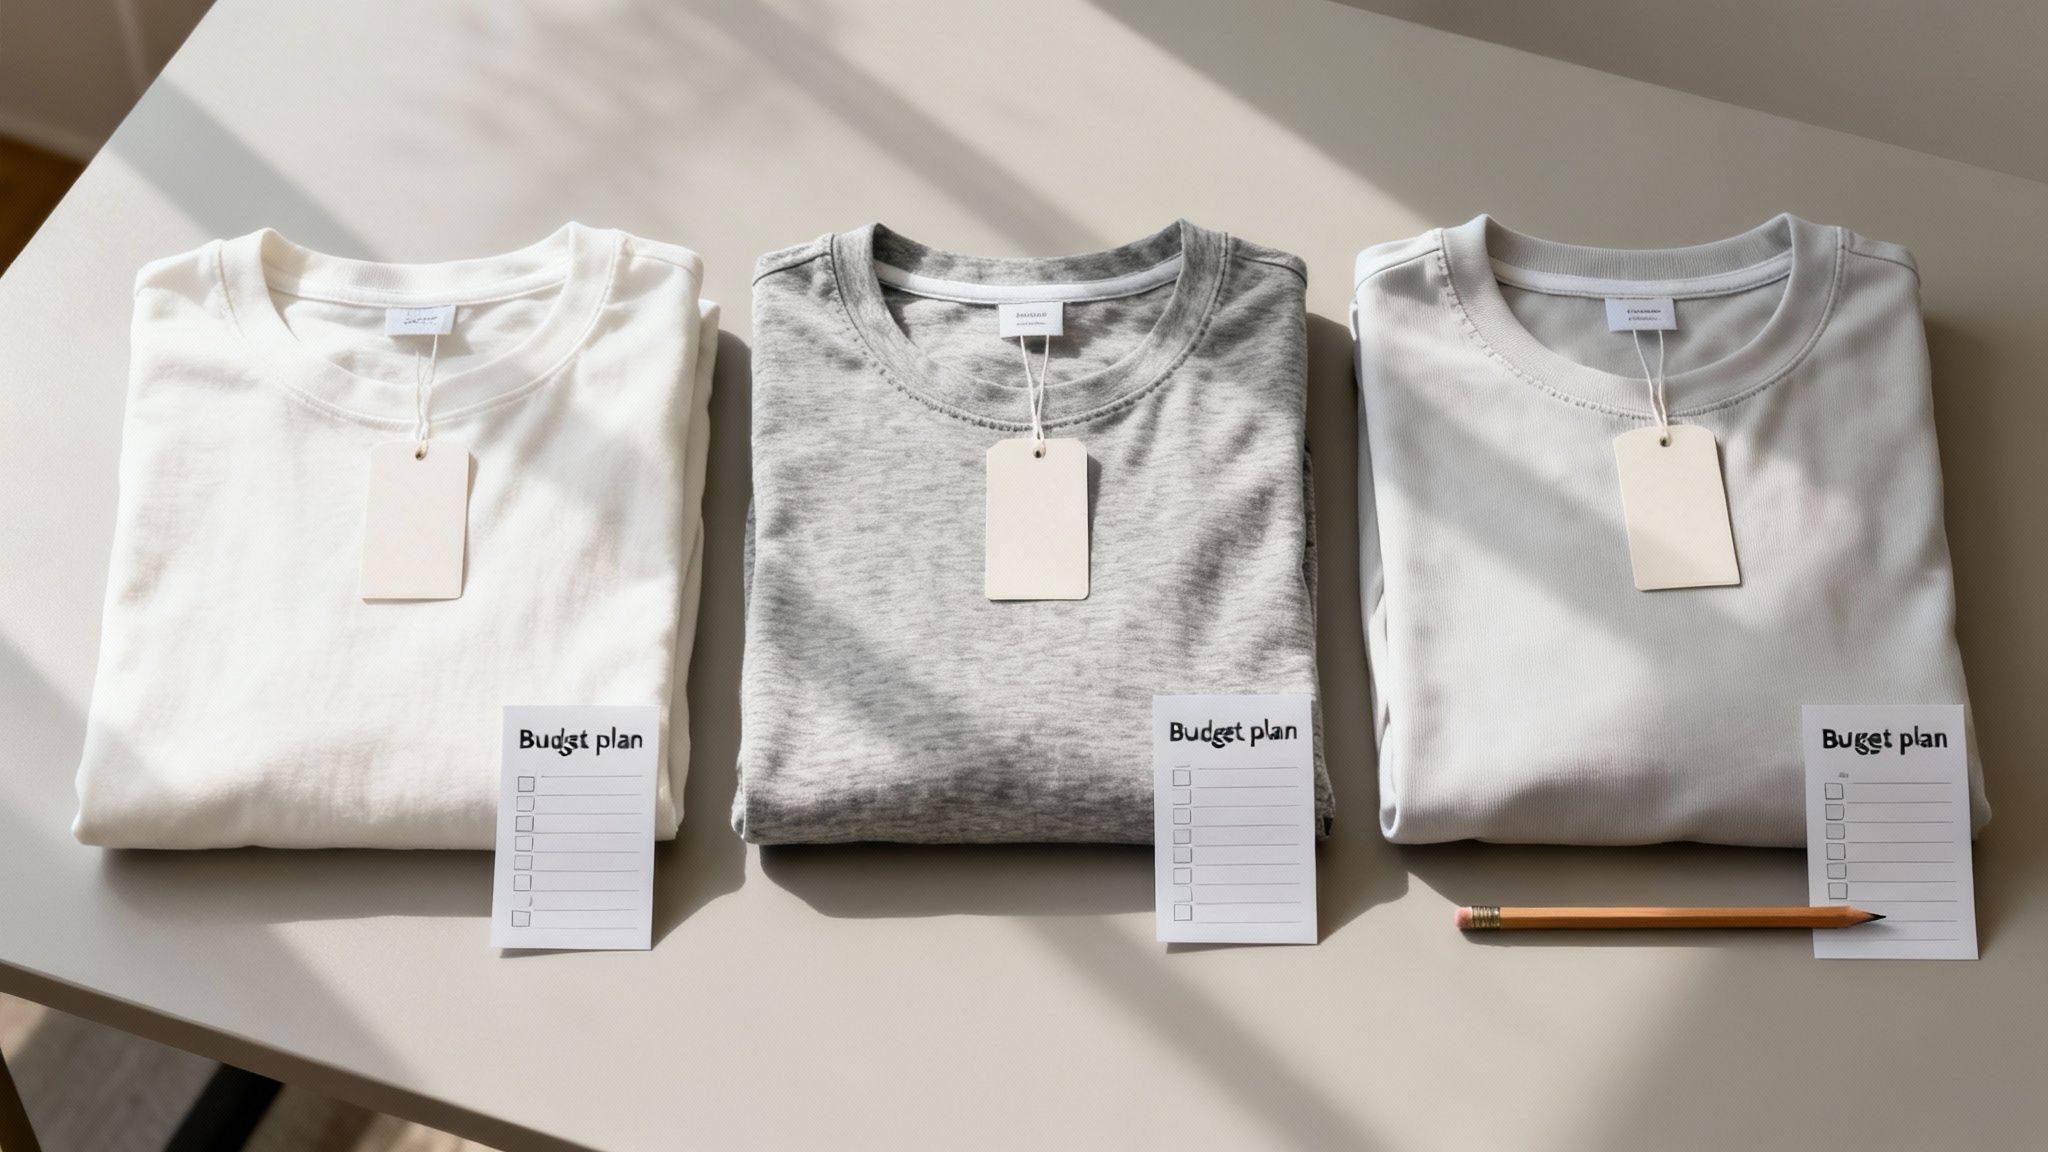
First, Nail Down Your Budget
Before you start looking at fabrics and colours, you need to figure out what "inexpensive" actually means for your project. Are you aiming for the absolute lowest cost-per-shirt for a huge giveaway, or do you need affordable quality for team uniforms that have to last more than one season?
Think about the end goal. For a local fun run, a simple, lightweight cotton tee with a one-colour screen print is a fantastic low-cost choice. But for a corporate event, you might decide to spend a little extra on a softer-blend shirt. Why? Because people are more likely to wear it again, giving your brand more visibility long after the event is over. Knowing what you want to achieve helps you put your money where it matters most.
Here's a quick look at the main elements that affect the price of your custom shirts, helping you make smart, budget-conscious decisions from the start.
Quick Guide to Budget-Friendly Custom Shirts
| Cost Factor | Impact on Price | Pro Tip for Saving Money |
|---|---|---|
| Shirt Material | Basic cotton is cheapest. Blends and performance fabrics cost more. | For most promotional needs, a 100% cotton tee is the perfect balance of comfort and cost. |
| Number of Colours | Each additional colour in your design increases the cost, especially for screen printing. | Simplify your design to 1-2 colours. A clever design doesn't need a rainbow to be effective. |
| Print Locations | A simple front print is standard. Adding prints on the back, sleeves, or tags adds to the price. | Stick to a single print location. A strong design on the front is often all you need. |
| Order Quantity | The price per shirt drops significantly as the quantity goes up. A small order is always more expensive per unit. | If you can, order in bulk. It's the single biggest way to lower your per-shirt cost. |
Making conscious choices in these four areas will have the biggest impact on your final invoice. It’s all about finding the right combination that fits your vision and your wallet.
How to Choose the Right Shirt on a Budget
The blank shirt you choose is the foundation of your entire project. It's what sets the tone for everything from the final cost to how the finished product feels. When you're looking for inexpensive custom shirts, the goal isn't just to find the cheapest possible option; it's about getting the best value for your money. A flimsy, poorly made shirt feels cheap and won't last, which won't do your brand or event any favours.

Your first major decision is the material, and each fabric offers a different balance of cost, comfort, and how well it takes a print.
-
100% Cotton: This is the classic, budget-friendly workhorse of the t-shirt world. It’s soft, breathable, and gives you a fantastic surface for both screen printing and direct-to-garment (DTG) printing, making your designs look sharp and vibrant. For most promotional events or big giveaways, you really can't beat a standard cotton tee for value.
-
Polyester Blends (e.g., 50/50 Cotton/Poly): When you mix in polyester, you get a shirt that’s more durable, moisture-wicking, and less prone to wrinkling or shrinking. Poly blends often feel a little softer than basic cotton and are a brilliant choice for team uniforms or staff shirts that need to stand up to regular wear.
-
Tri-Blends (Cotton/Poly/Rayon): This is your premium option. Known for an ultra-soft feel and a more fashionable, drapey look, tri-blends are definitely the most expensive of the three. They might not be the right fit for a massive giveaway, but they offer a much higher perceived value. This makes them perfect for merchandise you plan to sell or for special corporate gifts.
Understanding Shirt Weight and Quality
Once you've thought about the material, you need to consider the fabric's weight. This is measured in grams per square metre (GSM), and it tells you a lot about how durable and substantial the shirt will feel. A higher GSM usually means a thicker, more hard-wearing shirt.
For something like a one-day charity fun run, a lightweight shirt around 150 GSM is perfect. It’s breathable and won’t break the bank. On the other hand, if you're outfitting a landscaping crew, you’ll want something much more robust—closer to 180-200 GSM—to handle the daily grind.
Don't mistake "lightweight" for "low quality." The key is matching the shirt’s weight and material to its intended purpose. An inexpensive choice becomes a smart investment when it perfectly suits the occasion.
Let's say a marketing agency is ordering promotional tees. They might opt for a mid-weight cotton-poly blend. It costs a little more than the most basic cotton shirt, but it feels more premium. That small difference encourages people to actually wear it again and again, giving the brand way more visibility in the long run.
Making the Right Fit
Finally, don't overlook the fit and style. This is crucial if you want people to actually wear your shirts. It's worth taking a moment to explore different clothing categories to see the difference between a classic fit, a modern slim fit, or even V-necks and long sleeves. A shirt that fits well instantly feels more valuable.
Ensuring your chosen shirt fits perfectly is so important. These days, new tools like AI clothing try-on technology can even help you visualise how a shirt will look and fit before you place a big order. Taking that small step can save you from the costly headache of ordering hundreds of shirts that just don't fit your team or your audience properly. Getting the fit right is what ensures your investment truly pays off.
Design Your Shirt to Keep Printing Costs Down
Your design is where a shirt really comes to life, but it's also where your budget can quickly get out of hand. Honestly, creating a brilliant yet inexpensive custom shirt often boils down to one simple rule: less is more. The number of colours in your artwork has a direct, and often significant, impact on the final cost.
This is especially true for screen printing, which is still the go-to, most cost-effective method for bulk orders here in Australia. It's what most groups, events, and businesses use when they need affordable gear. In fact, its efficiency keeps it dominant, as you can see in recent Australian custom printing market research. With screen printing, every single colour in your design needs its own custom screen. That means more setup time, more materials, and higher labour costs—all of which end up on your invoice.
A design with six colours will be substantially more expensive than one with just two. By simplifying your colour palette, you’re not just saving money; you’re often creating a more impactful, classic look that people will actually want to wear again and again.
Embrace a Minimalist Design Approach
You really don't need a whole rainbow of colours to make a statement. I've seen some of the most memorable and professional-looking shirts that were incredibly simple.
Here are a few ways to design for affordability without looking cheap:
- Use Negative Space: This is a classic trick. Get clever and incorporate the shirt's fabric colour into your design. For example, on a navy blue shirt, you can let the blue of the fabric act as a colour within your logo. That way, you might only need to print the white elements, turning a two-colour job into a one-colour job.
- Choose High-Contrast Colours: There's a reason a single-colour print, like crisp white ink on a black shirt or bold black on a heather grey tee, is so popular. It creates a sharp, eye-catching result that looks premium without the premium price tag.
- Focus on Typography: Sometimes a powerful message or a unique font is far more effective than a complex graphic. A well-designed typographic shirt is timeless and very budget-friendly.
Pro Tip: Before you fall in love with your design, try mocking it up in just one or two colours. This simple exercise can reveal a stronger, more cost-effective version you might have otherwise missed. Getting your files ready is also a huge help; for some pointers, check out our simple guide on artwork submission tips for beginners.
Think Strategically About Where You Print
It’s not just what you print, but where you print it that affects the price. A massive, full-back print requires a lot more ink and takes longer to produce than a discreet logo on the left chest. A big print can definitely be impactful, but it's also one of the quickest ways to drive up your cost per shirt.
Consider these cost-effective placement options instead:
- Left Chest: This is a classic for a reason. It's perfect for logos—professional, visible, and uses minimal ink.
- Sleeve Print: A small logo or icon on the sleeve can add a really unique, custom touch without a big price hike.
- Upper Back (Nape Print): Placing a small logo just below the collar on the back is a subtle and stylish alternative to a full-sized back print.
By limiting your colours and being smart about placement, you take direct control over your budget. This kind of strategic thinking is how you get an amazing-looking product that truly fits the definition of an inexpensive custom shirt.
Select the Best Printing Method for Your Budget
Deciding how to get your design onto the fabric is a huge part of creating affordable custom shirts. The printing method doesn't just change the look and feel—it's one of the biggest factors in your final cost per shirt. Let's break down the main players: screen printing, digital printing (DTG), and heat transfers. Each has its sweet spot, and knowing the difference is your key to staying on budget.
Screen Printing: The Go-To for Bulk Orders
Screen printing is the classic, time-tested method for a reason. It works by pushing ink through a custom-made mesh screen directly onto the t-shirt. You need a separate screen for every single colour in your design, which means there's a bit of setup involved upfront.
Because of that initial setup, it's not the right choice if you only need five or ten shirts. But once those screens are ready? The cost per shirt plummets with every one you print. This makes screen printing the undisputed champion for large events, staff uniforms, or any order of 25 shirts or more, especially if your design is simple.
Think about it this way: if you're organising a charity run and need 100 shirts with a simple, one-colour logo, the setup cost for that single screen gets spread so thin it's barely noticeable. But if your design has four colours, the setup costs are four times higher, and you'll see that reflected in the price.
The Golden Rule of Screen Printing: The more shirts you order, the cheaper each one becomes. It's the ultimate method for achieving economies of scale on simple designs.
This flowchart gives you a quick visual on how things like the number of colours, the size of the design, and where you place it on the shirt all play into your final costs.
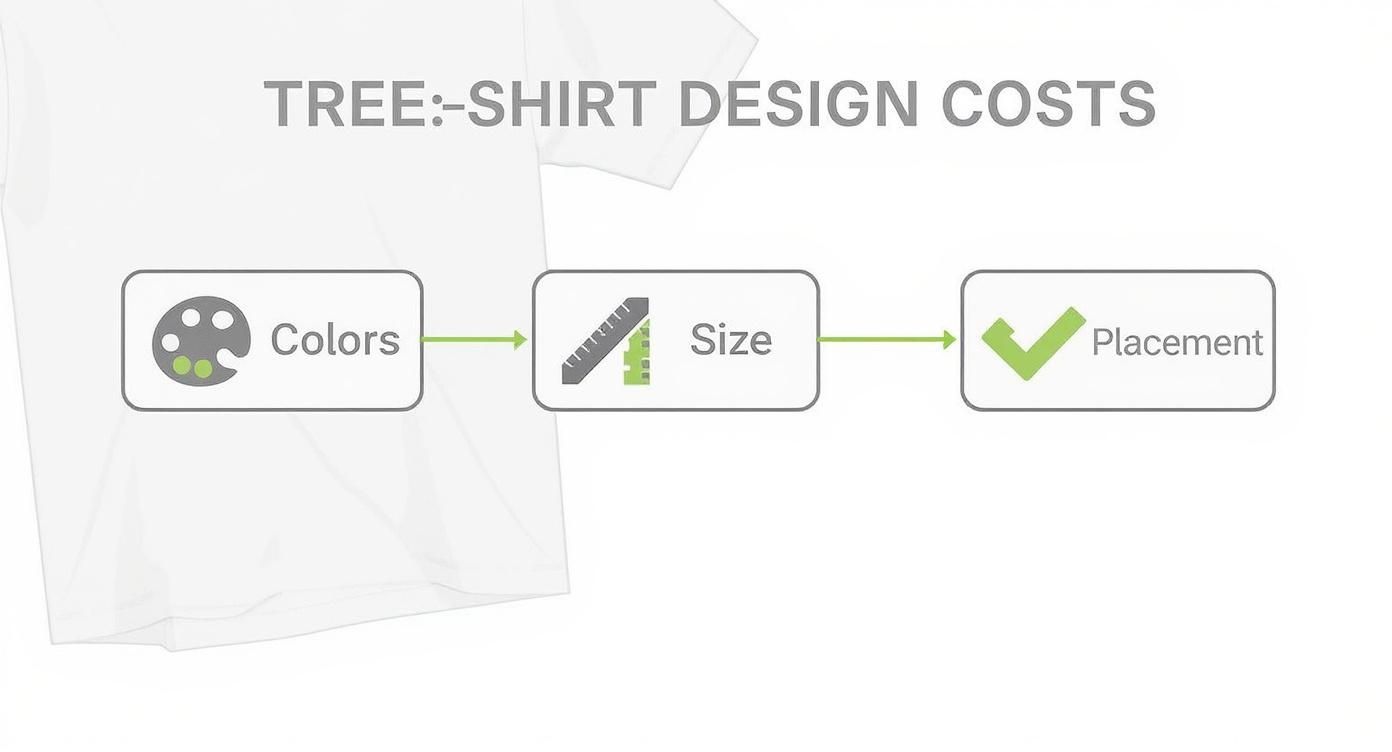
As you can see, keeping these three elements in check is your most direct path to a lower price tag.
Digital Printing (DTG): Perfect for Small Batches and Complex Art
So what happens when you only need a couple of shirts, or your design is a full-colour masterpiece? This is where Direct-to-Garment (DTG) printing comes in. Think of it like a highly specialised inkjet printer that applies the ink straight onto the fabric.
The best part? There are no screen setup costs. This immediately makes it the most affordable option for one-off prints, small batches, or designs with a tonne of colours. It's no surprise that digital printing is the fastest-growing segment in the Aussie t-shirt market, especially for these smaller, on-demand jobs.
DTG is your best bet for:
- Intricate Artwork: It handles gradients, shadows, and a million colours without breaking a sweat.
- Photographic Prints: It's really the only practical way to print a realistic photo onto a shirt.
- Sampling: Need to see a physical sample before you commit to a big screen printing run? A single DTG shirt is the perfect solution.
Heat Transfers: Ideal for Simple, Bold Customisation
Last but not least, we have heat transfers, often called heat transfer vinyl or HTV. This process involves cutting your design from a sheet of coloured vinyl and then using a heat press to apply it to the shirt.
It's absolutely brilliant for simple, bold personalisations. We see it all the time for adding individual names and numbers to the back of sports team jerseys. For that kind of one-by-one customisation, HTV is incredibly cost-effective. It just isn't built for large or super-detailed designs.
Printing Method Comparison for Budget Projects
Feeling a bit overwhelmed? This table breaks it all down, helping you match the right technology to your project's specific needs and budget.
| Printing Method | Best For | Cost Structure | When It's Inexpensive |
|---|---|---|---|
| Screen Printing | Bulk orders (25+), simple designs, corporate or event merchandise | High initial setup cost, low cost per shirt as quantity increases | Large quantities with 1-3 colours |
| DTG (Digital) | Small runs (1-20), full-colour photos, highly detailed artwork | No setup cost, consistent per-shirt price | One-off prints, small batches, or designs with many colours |
| Heat Transfer (HTV) | Personalisation (names, numbers), bold text, simple logos on small runs | Priced per application, material cost varies | Adding unique details to a small number of items |
Ultimately, choosing the right printing method is about balancing quantity, design complexity, and your budget. For a deeper dive into the technical side of things, feel free to explore our full guide on custom printing options. Getting this step right is how you bring your vision to life without breaking the bank.
How Your Order Size Impacts the Final Price
Getting the best deal on your custom shirts often comes down to one key factor: order volume. It’s a classic case of economies of scale—the more shirts you order, the less you'll pay for each one. Think of it this way: a lot of the cost is front-loaded into the setup, especially for methods like screen printing where physical screens need to be created.
Let's say the setup fee for your one-colour design is $50. If you only order five shirts, that's an extra $10 tacked onto each one before you even account for the shirt itself. But if you order 100 shirts? That same $50 setup fee suddenly becomes just 50 cents per shirt. That’s a massive difference and showcases the power of ordering in bulk.
Understanding Price Breaks
Most printers work with a tiered pricing system that includes what we call price breaks. These are essentially quantity milestones that, once you hit them, unlock a lower price per unit. You might see price breaks at quantities like 25, 50, 100, and 250 shirts.
This is where you can be clever with your ordering. You might find that ordering 25 shirts costs you almost the same as ordering 22. It’s always worth asking your printer where their price breaks fall. Knowing this allows you to stretch your budget further; sometimes, just adding a couple of extra shirts to your cart can bump you into a better pricing tier, delivering far more value.
Pro Tip: If your group is just shy of a price break—say you need 46 shirts and the break is at 50—it’s almost always smarter to order the extra four. You’ll have spares for new team members or future events, and you’ll get them at a lower cost per shirt.
Finding a Reputable, Budget-Friendly Printer
Your choice of supplier is just as important as your design. A good printer won't just take your order; they'll work with you, offering transparent pricing and guiding you toward the most cost-effective options for what you want to achieve.
When you're looking for a printer here in Australia, here’s what I recommend focusing on:
- Dig into online reviews. Look for printers with consistently good feedback on their communication, print quality, and ability to meet deadlines. Also, see how they handle negative reviews—it tells you a lot about their commitment to getting things right.
- Insist on an itemised quote. A single, lump-sum price isn't good enough. A professional quote will break everything down: the cost of the blank shirts, the printing fees, any setup charges, and shipping. No surprises.
- Ask about hidden fees. Be upfront. Ask about potential artwork charges for cleaning up a logo, extra costs for special ink colours, or rush fees if you're on a tight schedule. A trustworthy partner will be transparent from the get-go.
Finding the best price isn't just about the lowest number on a quote; it's about the total value and service you get. To get a feel for what’s out there, you can browse our curated selection of promotional products sorted by price to see what fits your budget.
Ultimately, building a good relationship with your printer is the secret sauce. A supplier who understands your goal—creating fantastic, inexpensive custom shirts—will partner with you. They’ll suggest small tweaks to your design or order size that can save you a bundle without sacrificing your vision. That partnership is what ensures you end up with a product you're genuinely proud of, at a price that makes sense.
Your Questions About Affordable Custom Shirts, Answered
Jumping into the world of custom apparel can feel a bit overwhelming, especially when you're trying to make every dollar count. To help you get your project over the line with total confidence, we've tackled some of the most frequent questions we get about creating great custom shirts on a tight budget.
What’s the Cheapest Way to Print Just One Shirt?
If you only need a single, one-off shirt, Direct-to-Garment (DTG) printing is your best bet, hands down. Think of it like a high-tech inkjet printer, but for fabric. It applies your design directly onto the shirt, which is a completely different process from screen printing.
The big advantage here is that DTG has no setup fees. Screen printing, on the other hand, involves creating a separate screen for each colour in your design, which gets expensive fast for small runs. That makes DTG perfect for testing a design, creating a one-of-a-kind gift, or making a sample before a big order.
How Do I Cut Design Costs Without Making It Look Plain?
The secret is to work smarter, not cheaper. The most effective way to slash costs is to limit your colour count and the number of print locations. Honestly, a crisp one or two-colour design often looks more polished and professional than something overloaded with colour.
You can also get creative and use the colour of the shirt itself as part of your design. Got a navy blue shirt? Let that deep blue act as a background element or a colour within your logo. A thoughtfully placed, single-colour print on the chest or sleeve can have a much bigger impact than a busy, expensive design plastered on both the front and back.
Pro Tip: A great design doesn’t come from using every colour in the rainbow. It comes from clever thinking. Simplicity, strong contrast, and smart placement are what make a custom shirt look professional and stay within budget.
Are There Any Hidden Costs I Need to Look Out For?
Yes, and this is where you need to pay close attention. Before you agree to anything, always, always ask for a fully itemised quote that breaks down every single charge.
Keep an eye out for these common extras that might not be obvious at first:
- Screen setup fees: These are standard for screen printing, but you need to know what they are upfront.
- Artwork fees: If your design file isn't print-ready, some printers will charge to fix it.
- Specialty ink charges: Want metallic, glitter, or glow-in-the-dark ink? Expect to pay a bit more.
- Unexpected shipping costs: Make sure the shipping price is clearly stated and not an inflated last-minute surprise.
A good, reliable printer will be completely transparent about their pricing. Don't move forward until you have a final, all-inclusive price confirmed.
Does Ordering More Shirts Really Make Them Cheaper?
In almost every case, yes. The vast majority of printers operate on a tiered pricing system with ‘price breaks’. This simply means the cost per shirt goes down as your order quantity goes up. You'll often see these breaks at quantities like 25, 50, or 100 shirts.
It’s not unusual to find that ordering 50 shirts costs almost the same as ordering 45. A quick question to your printer about where their price breaks fall can help you get the absolute best value for your money.
Ready to create high-quality, inexpensive custom shirts that make your brand stand out? The expert team at Simply Merchandise is here to help you every step of the way, with a lowest-price guarantee and free artwork layouts to ensure you get the perfect result. Explore your options and get a quote today at https://simplymerchandise.com.au.


