Putting your own design onto a tote bag is a fantastic way to create something truly unique. You can print directly onto the fabric, and there are a few great ways to do it.
For anyone starting out or tackling a DIY project at home, Heat Transfer Vinyl (HTV) is usually the easiest way to go. You just cut your design out of a special vinyl sheet and use heat—like an iron or heat press—to apply it. If you're after a more professional, long-lasting finish, screen printing is brilliant for bold, vibrant colours, especially for simpler logos. For really detailed, full-colour images, Direct-to-Garment (DTG) printing is your best bet.
Your Ultimate Guide to Printing on a Tote Bag
Turning a blank tote into a custom accessory or a standout promotional piece is more straightforward than you might think. Whether you're a creative hobbyist, a small business owner looking for branded merch, or organising an event, making a custom printed tote is a really satisfying project. Let's walk through everything you need to know, from picking the right materials to getting your design just right and making sure it lasts.
Custom totes are everywhere these days, and a big reason for that is our collective move away from single-use plastics. Think about it: ever since Australia started phasing out plastic bags back in 2018, the appetite for reusable alternatives has gone through the roof. This shift has helped the retail bag market grow to an estimated USD 1.03 billion, and it's not slowing down. A well-designed custom tote can be a walking advertisement for your brand, a personal style statement, or a genuinely thoughtful handmade gift.
Before you jump in, it’s worth thinking through a few key things about your project:
- What's it for? Are you creating merch to sell, bags for a promotional giveaway, or just a one-off for yourself? Your purpose will shape the printing method and quality you need.
- How complex is your design? Simple text or a one-colour logo is a different ball game than a full-colour photograph.
- How many do you need? The number of bags you're making will really influence which printing technique makes the most sense financially.
- What's the fabric? Cotton canvas is the classic choice for a reason—it's sturdy and takes prints well. But different fabrics pair better with certain printing methods.
Once you’ve got the printing process down, figuring out how to price handmade products strategically is a crucial next step if you want to turn your creativity into a business.
And if you're looking for the perfect blank canvas to start with, check out this great range of promotional bags that are ideal for custom printing.
Choosing the Right Printing Method for Your Project
Picking the right way to get your design onto a tote bag is probably the most critical decision you'll make in this whole process. It's not just about looks; the method you choose has a direct knock-on effect on the cost, the feel of the final product, and how well it holds up over time.
There isn't one "best" method. Instead, different techniques shine in different situations. The big three you'll come across are screen printing, heat transfer vinyl (HTV), and direct-to-garment (DTG) printing. Let's break down where each one excels so you can match your vision with the right process.
https://www.youtube.com/embed/S0YbautIqsY
Screen Printing for Bulk and Boldness
When you need a large batch of bags and your design is relatively simple and bold, screen printing is almost always the answer. It’s a classic for a reason. The process uses a custom stencil (the 'screen') for each colour in your design, pushing ink through it directly onto the bag. This creates a really vibrant, tough print that practically becomes one with the fabric.
Think about ordering 200 tote bags for a conference with your company's one-colour logo. Screen printing is perfect here. While there’s an initial setup cost for the screens, that cost gets spread so thin across a big order that the price per bag becomes incredibly low. You're left with a professional, super durable print that will survive years of being thrown in the car.
Heat Transfer Vinyl for Customisation
If you're doing a small run or want to add a personal touch to each bag, Heat Transfer Vinyl (HTV) is your best friend. With HTV, your design is precision-cut from a sheet of coloured vinyl and then applied to the bag using a high-temperature heat press. This makes it a fantastic option for things like adding individual names or creating designs with really crisp, sharp edges.
An Etsy seller making one-off bags with witty quotes or sparkly, metallic graphics would lean heavily on HTV. It offers amazing flexibility with no minimum order requirements. The only thing to keep in mind is that the design sits on top of the fabric, so it has a slightly raised feel and might not be ideal for massive, complex images with lots of colours.
This handy decision tree can help you figure out the best path for your project at a glance.
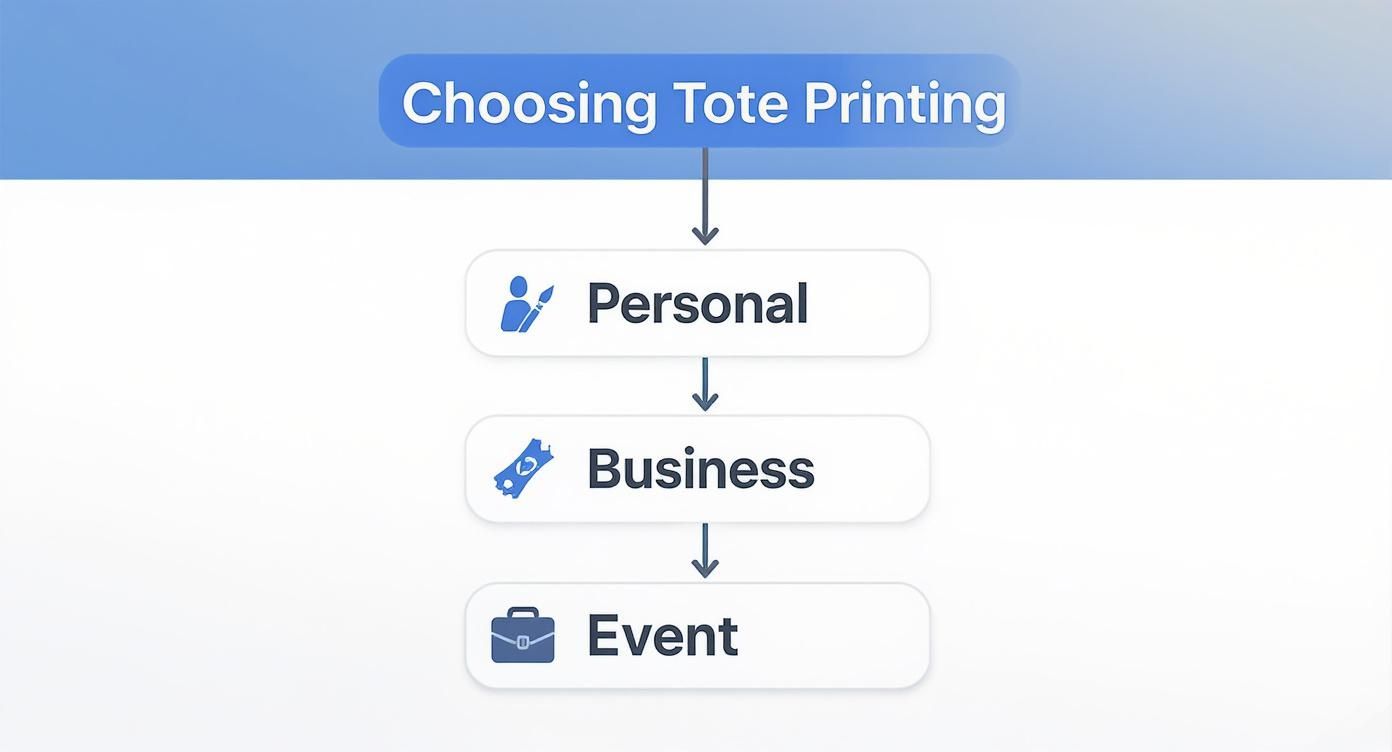
As you can see, your end goal—whether it's a personal gift, a business giveaway, or a retail product—is the biggest clue pointing you toward the right printing tech.
Direct-to-Garment (DTG) for Photographic Detail
What if your design is a full-blown photograph or a piece of art with loads of intricate details and colour gradients? That’s where Direct-to-Garment (DTG) printing comes in. It works a bit like your office inkjet printer, but for fabric, applying special water-based inks directly onto the tote. The result is a stunning, photorealistic print that screen printing just can't match for complexity.
An artist wanting to reproduce a watercolour painting on a small batch of cotton totes would use DTG to capture every last subtle brushstroke and shade. Because the ink soaks right into the fibres, the print has a beautifully soft feel. It's brilliant for complex designs in smaller numbers, though it can get pricier than screen printing if you're planning a massive run of simple logos.
Key Takeaway: The question isn't "what's the best printing method?" but "what's the best printing method for my project?" Your design, quantity, and budget will always point you to the right choice.
To make things even clearer, let's put these three methods head-to-head.
Printing Method Comparison for Tote Bags
This table gives a quick rundown of the main differences to help you weigh your options based on what matters most for your specific tote bag project.
| Feature | Screen Printing | Heat Transfer Vinyl (HTV) | Direct-to-Garment (DTG) |
|---|---|---|---|
| Best For | Large orders (50+), simple logos with few colours. | One-offs, individual names, simple graphics. | Full-colour photos, detailed artwork, small runs. |
| Feel on Fabric | Ink soaks slightly into the fibres, creating a durable layer. | Sits on top of the fabric; can feel like a thin plastic layer. | Very soft and breathable as ink dyes the fabric. |
| Durability | Extremely high and long-lasting through many washes. | Good, but can be prone to cracking or peeling over time. | Very good wash resistance, especially on light fabrics. |
| Cost | Low per unit on large runs, but high initial setup cost. | Moderate per unit with no setup costs, ideal for small orders. | Higher cost per unit, but cost-effective for one-off complex prints. |
Ultimately, choosing the right method is a balancing act between these factors. To get a real feel for what’s possible, it’s worth taking a look at a gallery of custom printing options to see visual examples of each final product.
It's also worth noting how much consumer tastes are shaping these choices. There's been a huge swing towards sustainable materials. Today, paper and natural fabrics like cotton—the perfect canvas for a printed tote—make up a massive 60.7% of the retail bag market. This trend shows a real desire among Australians for eco-friendly products that also let them show off their personality with a high-quality print. You can read more about these fascinating retail trends here.
Preparing Your Artwork for a Flawless Print
 Even the most incredible design can fall flat if the digital file isn't set up properly. Nailing your print-ready artwork is probably the single most important part of the process. It's what stands between a professional, sharp-looking tote bag and a final product plagued by pixelation or weird colour shifts.
One of the first things to get your head around is the file type. The choice between vector and raster formats will genuinely make or break your design, depending on your chosen print method.
You can think of vector files (like .AI, .EPS, or .SVG) as being built from mathematical formulas. This means you can stretch them to any size—from a postage stamp to a billboard—and they will never lose quality. This makes them the gold standard for screen printing, where you need those super crisp lines to create perfect stencils.
Key Technical Specs for a Great Design
File format is just the start; a few other technical details are crucial. When you're using raster images (.PNG, .JPG, .TIFF) for methods like DTG printing, resolution is everything. A low-resolution image might look fine on your screen, but it will turn into a blurry, pixelated mess when it's scaled up for the tote bag.
For a really crisp, high-quality result, you should always aim for an image resolution of 300 DPI (dots per inch) at the actual print size. This is the industry standard for ensuring every detail comes through clearly.
Colour mode is another big one. Your computer screen shows colours in RGB (Red, Green, Blue), but professional printers work in CMYK (Cyan, Magenta, Yellow, Black). If you design in CMYK right from the beginning, you’ll get a much more accurate idea of how the colours will look on the final bag, avoiding any nasty surprises.
Final Checks Before You Hit 'Send'
Before you hand your file over to the printer, it's worth running through a quick final checklist. Trust me, spending a few extra minutes here can save you a lot of time, money, and frustration down the line.
- Convert Fonts to Outlines: This is non-negotiable. It turns your text into a vector shape, so the printer doesn’t need to have your specific font installed. It guarantees your typography looks exactly how you intended.
- Set the Correct Dimensions: Design your artwork at the actual size it will be printed on the tote. If you want it to be 10cm wide on the bag, make it 10cm wide in your design file.
- Embed All Images: If your design uses any linked images, make sure you embed them directly into the file. This prevents them from going missing when the printer opens it.
Getting these technical details right is more important than ever. The Australian bags and containers market, which pulled in USD 1,713.4 million in revenue, is seeing a huge demand for top-notch, custom designs, especially from younger shoppers.
If you’re stuck for ideas, an AI T-Shirt Design Generator can be a really helpful starting point for creating unique graphics. And if this all feels a bit new to you, our detailed guide on https://simplymerchandise.com.au/pages/artwork-submission-tips-a-simple-guide-for-beginners is packed with more handy advice. A little bit of prep work ensures your vision is translated perfectly onto fabric.
Your Guide to Nailing HTV Printing at Home
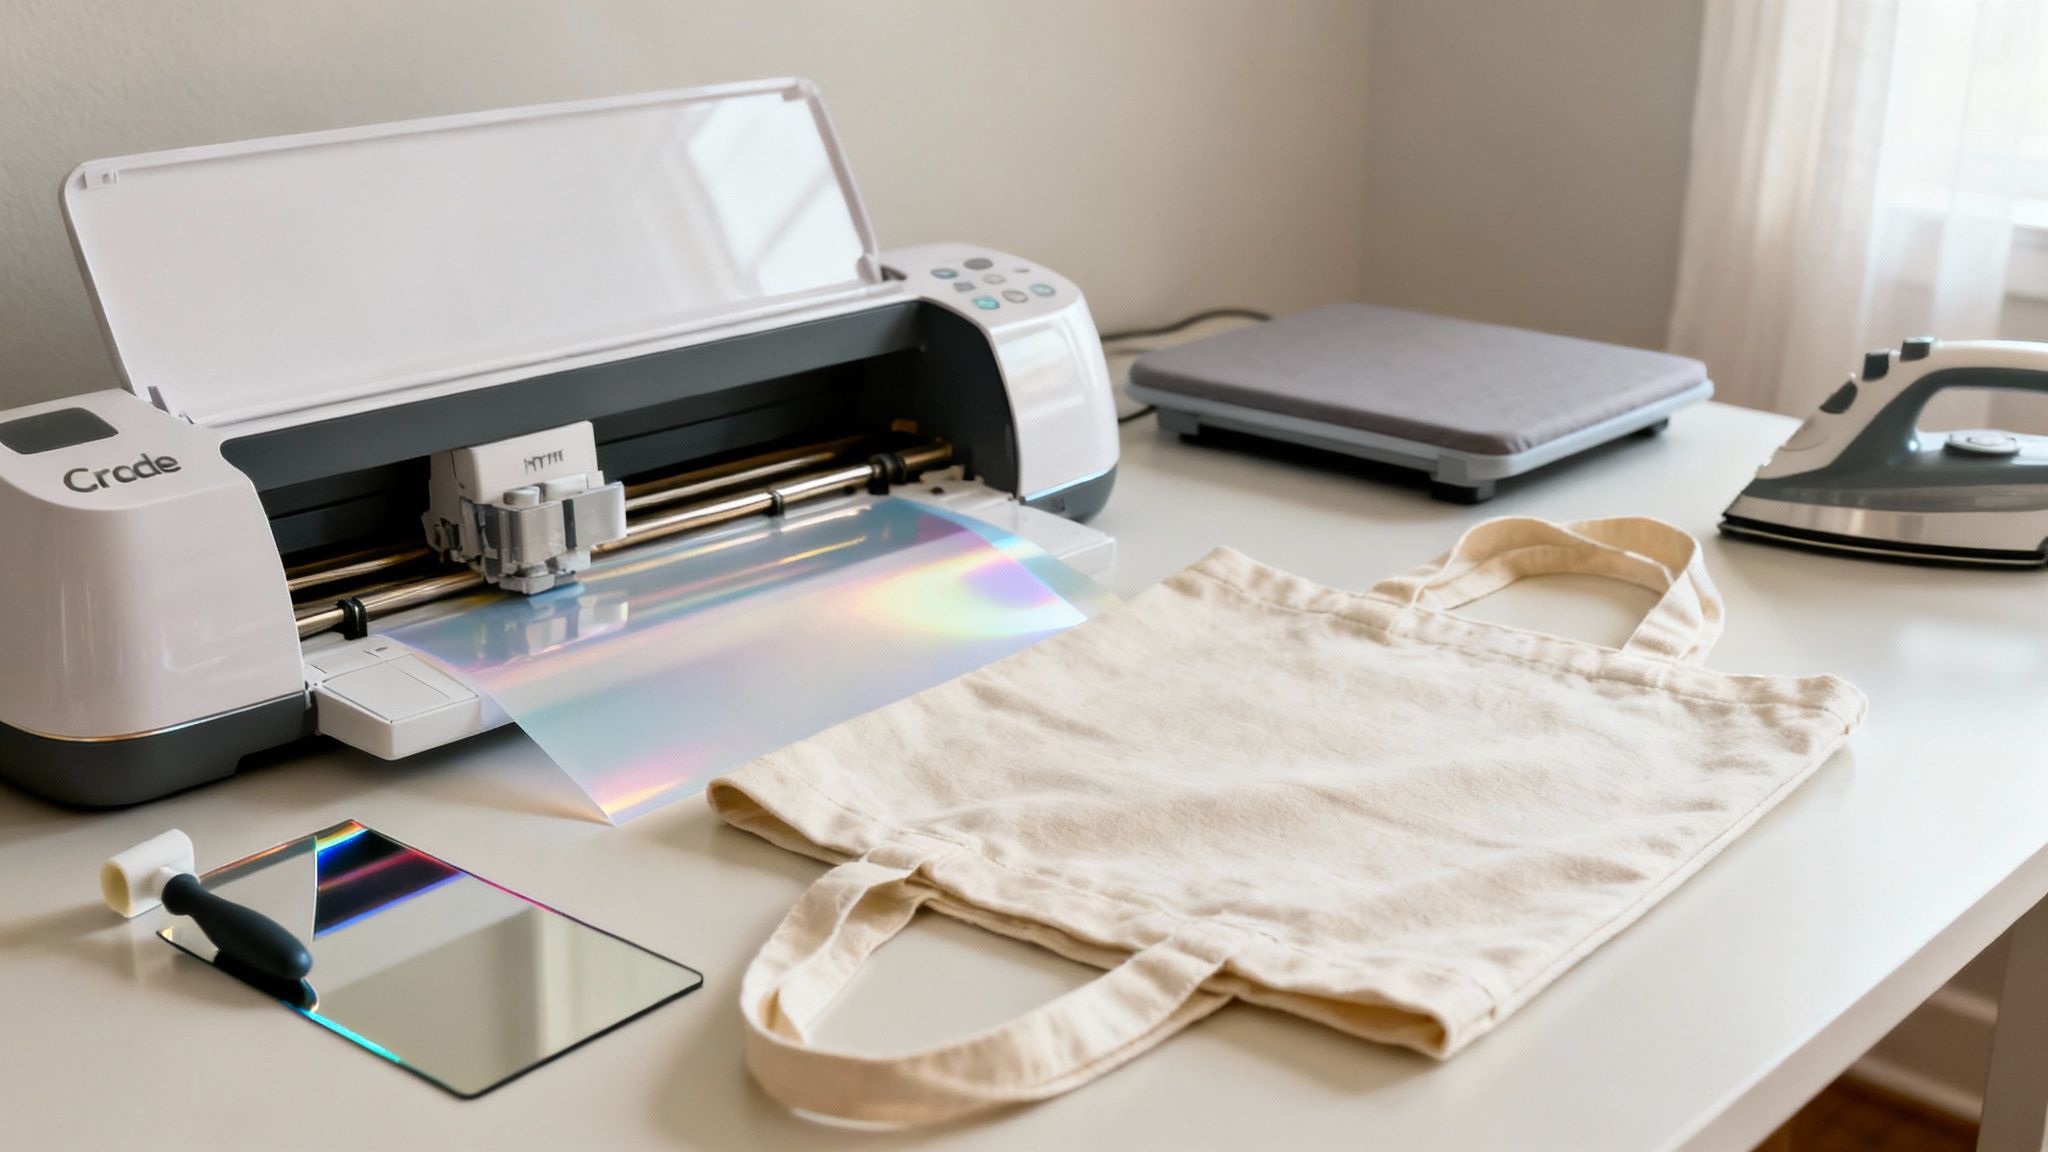
If you're looking for a beginner-friendly way to print on a tote bag, Heat Transfer Vinyl (HTV) is where you want to start. It’s a wonderfully accessible method that gives you a sharp, vibrant, and surprisingly durable design that looks like it came straight from a pro.
Essentially, you cut a design from a special sheet of vinyl, then use a heat press (or even a household iron) to bond it permanently to the fabric. Let’s walk through how to get it right from the very beginning.
Prepping Your Tote and Artwork
Before you even touch your vinyl, the tote bag itself needs a little prep work. Always, and I mean always, pre-wash and dry your canvas tote. Skip the fabric softener, though. This crucial first step preshrinks the cotton and gets rid of any manufacturing residues that could stop the vinyl from sticking properly.
Once it's clean and dry, grab your iron and press the bag until it's perfectly flat. You need a smooth, wrinkle-free surface to work with, as this helps you get even pressure when it's time to apply the design.
Now for your digital artwork. There's one golden rule you can't forget: mirror your image horizontally before you send it to the cutter. Since you'll be placing the vinyl design-side down, flipping it ensures the final result reads the right way. This is absolutely critical for any design with text!
Cutting and Weeding the Vinyl
With your design mirrored, it's time to make the cut. Place your HTV onto the cutting mat with the shiny side facing down. That shiny layer is the clear carrier sheet that will hold your design together.
- Machine Settings: Dial in the right cut settings for HTV on your machine, whether you're using a Cricut, Silhouette, or another brand. It’s always a good idea to do a small test cut on a corner to avoid wasting the whole sheet.
- Weeding: This is the slightly tedious but oddly satisfying part where you remove all the unwanted vinyl. Grab a weeding tool (anything sharp and pointy works) and carefully peel away all the negative space, leaving just your design on the carrier sheet. Good lighting is your best friend here.
Applying Heat for That Perfect Finish
This is where the magic happens! You can use a dedicated heat press or a standard household iron to bring your design to life. A heat press is always the better choice because it delivers consistent temperature and even pressure—the two keys to a professional-looking transfer.
The secret to a durable HTV application isn't just heat; it's a combination of the right temperature, firm pressure, and precise timing. Always consult the instructions that came with your specific type of vinyl.
If you’re working with a household iron, turn it up to the cotton/linen setting and make sure the steam is switched off. Find a hard, flat surface (an ironing board is usually too soft) and press down firmly for about 15-20 seconds on each section of your design. Don't slide the iron around like you’re ironing a shirt; it’s all about direct, firm pressure.
For bigger projects or if you're looking to produce multiple bags for an event or business, doing this by hand can be time-consuming. In those cases, getting an instant print quote for professional services can be a more efficient option.
Finally, check if your vinyl is a "hot peel" or "cold peel." This tells you whether to rip off the clear carrier sheet straight away or wait for it to cool down. Peeling at the wrong temperature can pull your design right off the fabric. If you notice any lifting, just lay the carrier sheet back down and give it another press.
Aftercare Tips to Make Your Print Last
So, you’ve got your hands on a fantastic custom tote bag! The real trick now is keeping that brilliant design looking sharp for as long as possible. A little bit of aftercare goes a long way in preventing the print from fading, cracking, or peeling after just a few outings.
First thing’s first: be patient. Before you even think about washing your new tote, you need to let it be for at least 24 to 48 hours. This waiting game is crucial because it gives the ink or vinyl adhesive time to fully cure and bond with the fabric. It’s this curing period that creates a durable finish ready for the real world.
Washing and Drying Your Custom Tote
When it’s finally time for a wash, always turn the tote bag inside out. It's a simple step, but it protects the printed surface from rubbing against other clothes or the inside of the washing machine. Think of it as a shield for your design.
To keep your print looking its best, stick to these simple rules:
- Wash with cold water only. Hot water is notorious for making colours bleed and fade, and it can weaken adhesives.
- Stick to a gentle cycle. A delicate or hand-wash setting is much kinder to both the fabric and the print.
- Use a mild detergent. Steer clear of harsh chemicals, bleach, and fabric softeners, as they can break down the print over time.
Drying your tote correctly is just as important as washing it. The intense heat from a tumble dryer can completely ruin a print, causing it to crack, peel, and shrink into a distorted mess.
The number one rule for a long-lasting print is to never put it in the tumble dryer. Your best bet is to hang the tote up or lay it flat to air-dry.
Ironing and General Maintenance
If your tote ends up with a few creases, you can definitely iron it, but you have to be careful. Turn the bag inside out so the iron’s hot plate never touches the design directly. A low-to-medium heat setting without steam will do the job perfectly without causing any damage.
Getting into these small habits will make a huge difference in the lifespan of your custom tote, keeping it looking great for years. Of course, starting with quality materials makes a big difference too. You can find some fantastic, long-lasting eco-friendly tote bags that provide the perfect canvas for any design.
Got Questions About Printing on Totes? Let’s Clear Things Up.
Diving into a custom tote bag project for the first time? You're bound to have a few questions. Whether you’re a business owner needing some slick promotional gear or just getting creative for a personal gift, sorting out the details beforehand can save a lot of headaches (and money).
We get asked these questions all the time, so let's walk through the common ones.
What’s the Best Fabric for Printing on a Tote Bag?
The best material for your tote bag really boils down to how you plan on printing it. Different fabrics play differently with inks and transfers, and that affects both how your design looks and how well it holds up over time.
For classic printing methods like screen printing or Direct-to-Garment (DTG), you really can't go past 100% cotton canvas. Its natural, porous fibres soak up ink like a dream, giving you those rich, vibrant colours that are made to last. If you're going the Heat Transfer Vinyl (HTV) route, you’ve got a bit more wiggle room. HTV works a treat on cotton, polyester, and even poly-cotton blends.
Here’s a quick rundown of your best bets:
- Cotton Canvas: This is the undisputed champion for most printing methods. It offers fantastic ink absorption and is incredibly durable.
- Polyester Blends: A solid choice for HTV applications, as the synthetic fibres create a really strong bond with the vinyl's adhesive.
- Jute or Burlap: These give you that great rustic, eco-friendly vibe. Just keep in mind their coarse texture means they're best suited for simple, bold designs, usually put on with a screen print.
Can I Just Use My Regular Iron for HTV on a Tote?
Yes, you definitely can use a standard household iron to apply Heat Transfer Vinyl. It's one of the main reasons HTV is so popular for DIY projects!
But, and it’s a big but, there's a world of difference between a home iron and a professional heat press. A proper heat press provides perfectly even pressure and a consistent temperature across your entire design, which is the secret to getting a strong bond that won’t peel off after a few uses.
When you're using an iron, you have to do all that work yourself by applying firm, steady pressure. You need to be methodical, making sure every single part of the design gets enough heat. And remember: turn the steam function off and set the iron to the highest temperature the fabric can handle.
A household iron is great for a one-off personal project or for testing out an idea. But if you’re planning to sell your totes or make a big batch, investing in a heat press will give you that professional, consistent finish every single time.
How Much Does It Actually Cost to Print on a Tote Bag?
The cost of printing on a tote bag can swing wildly. It all depends on your chosen method, how complex your artwork is, and, of course, how many bags you're printing. A single, custom bag will always have a higher per-unit cost than a bulk order of 500.
If you're taking the DIY approach with HTV, your initial outlay will be for equipment like a cutting machine (think $300-$500) and a heat press (which can start around $200), plus the cost of the vinyl itself, which is usually a few dollars a sheet.
When you go with professional printers, the costs are structured quite differently:
- Screen Printing: This is hands-down the most budget-friendly option for large orders. For a simple, one-colour design on an order of 100+ bags, you could be looking at anywhere from $5 to $8 per bag, plus an initial screen setup fee. This economy of scale is why over 90% of promotional totes you see are single-colour prints.
- Direct-to-Garment (DTG): This method is perfect for small runs of highly detailed, multi-colour designs, like a photograph. There are no setup fees, but the cost per bag is higher, generally landing between $15 and $25.
Nailing down the right printing method is key to making sure your project not only looks fantastic but also stays on budget.
Ready to bring your own custom tote bag ideas to life? Explore the endless possibilities with Simply Merchandise and get a fast, free quote for your project today